
Frozen Snowflake Nail Art
This layered manicure with glitter and stamping created the perfect Frozen Snowflake Nail Art I wanted for Christmas.

Frozen Snowflake Nail Art | Keely’s Nails
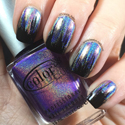
Apologies – my camera loves the ILNP bottles more than my nails recently!
Polishes and tools
Models Own Hypergel White Light
Picture Polish LakoDom
ILNP My Private Rainbow X
MoYou London Festive 02
Models Own Chrome Grey
Color club Angel Kiss
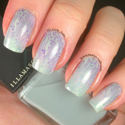
I started with one coat of White Light because I know that LakoDom is quite sheer. Then two coats of the Picture Polish next. I added a thin coat of My Private Rainbow X and a top coat before stamping.

Frozen Snowflakes Nail Art | Keely’s Nails
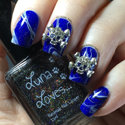
While stamping I alternated the two colours – Chrome Grey and Angel Kiss – for which was on top. I used snowflakes from all over the Festive 02 plate so all my nails were a bit different.
After stamping I added another thin layer of My Private Rainbow X and top coat to finish.

Frozen Snowflakes | Keely’s Nails
I don’t have a macro lens, but here’s a close up to show the layers of stamping and glitter. I really need better hoods on my lamps to get rid of the flare in my photos! I’m looking forward to using my new tripod that I get for Christmas, it will definitely help me focus better in my photos.
Frozen Snowflake Nail Art
This wasn’t entirely how I pictured it looking, but it was perfect for Christmas Day and was oh-so-sparkly! The green holo stamping with Angel Kiss came out a bit less defined than I would like but the colour worked really well. I didn’t take any polish away with me (so it has been a proper break!) and having a white/light base means that tipwear isn’t visible. Chrome Grey is definitely purple rather than a steel grey which I was expecting, but again I like how it looks. I’m ready for some New Year Neons – my favourite way to start a grey, miserable January!

January 1, 2016
it’s beautiful, you are right, looks a lovely shade of purple 🙂
January 1, 2016
Thank you Lana! Yes, I really love the shade, but I’ll still look out for a steely grey shade too 😉