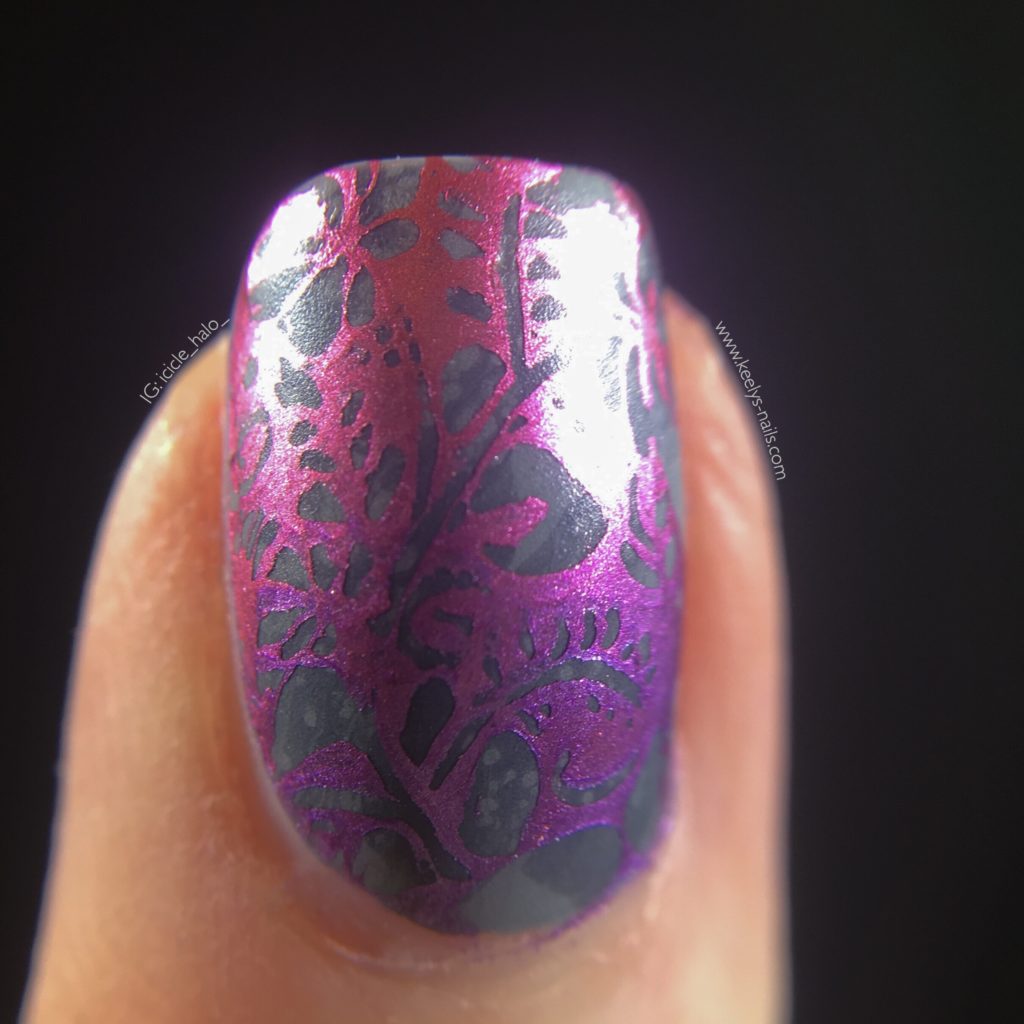
A matte top coat really makes a metallic polish pop
Recently I went out for brunch to celebrate my upcoming birthday, and this matte metallic gradient stamping was the design I created. I went to B&H Buildings with my besties Lisa and Kim, for an amazing bottomless brunch with apple and pear mimosas.
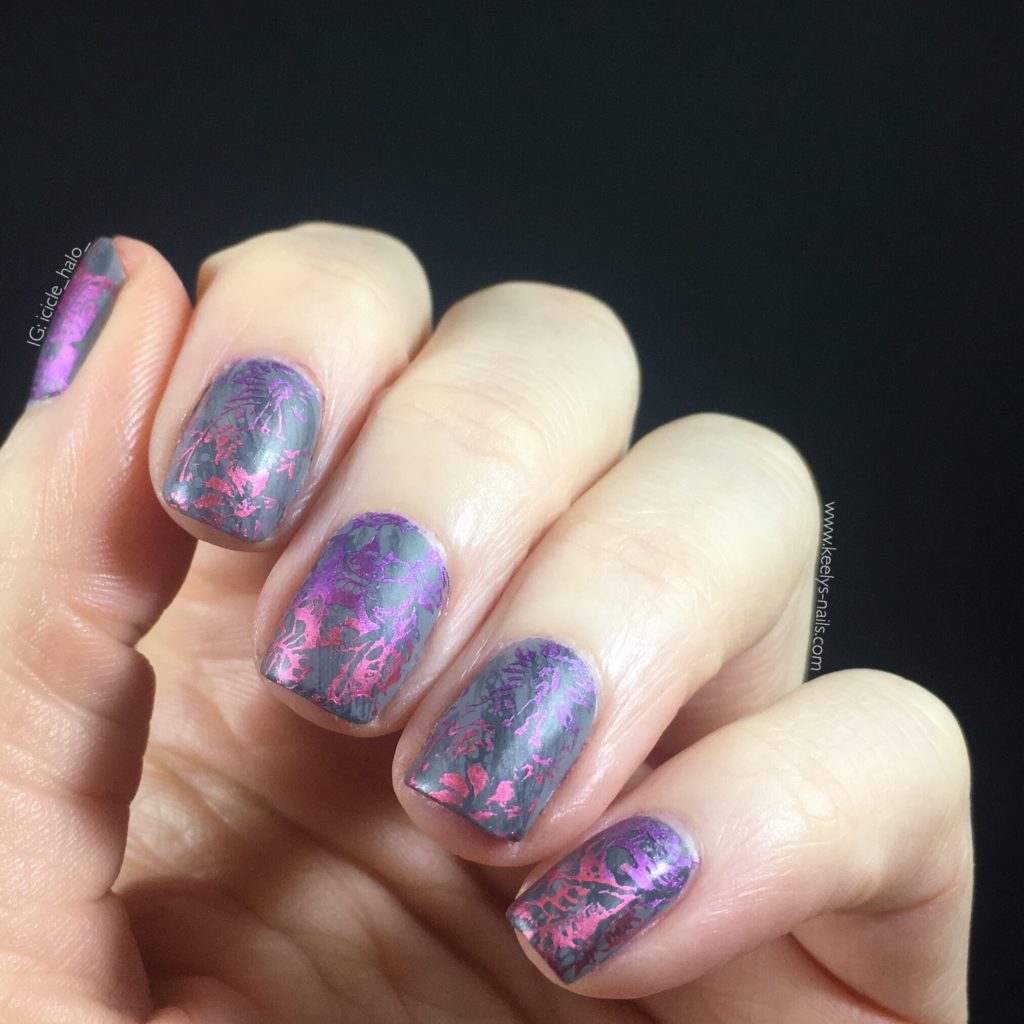
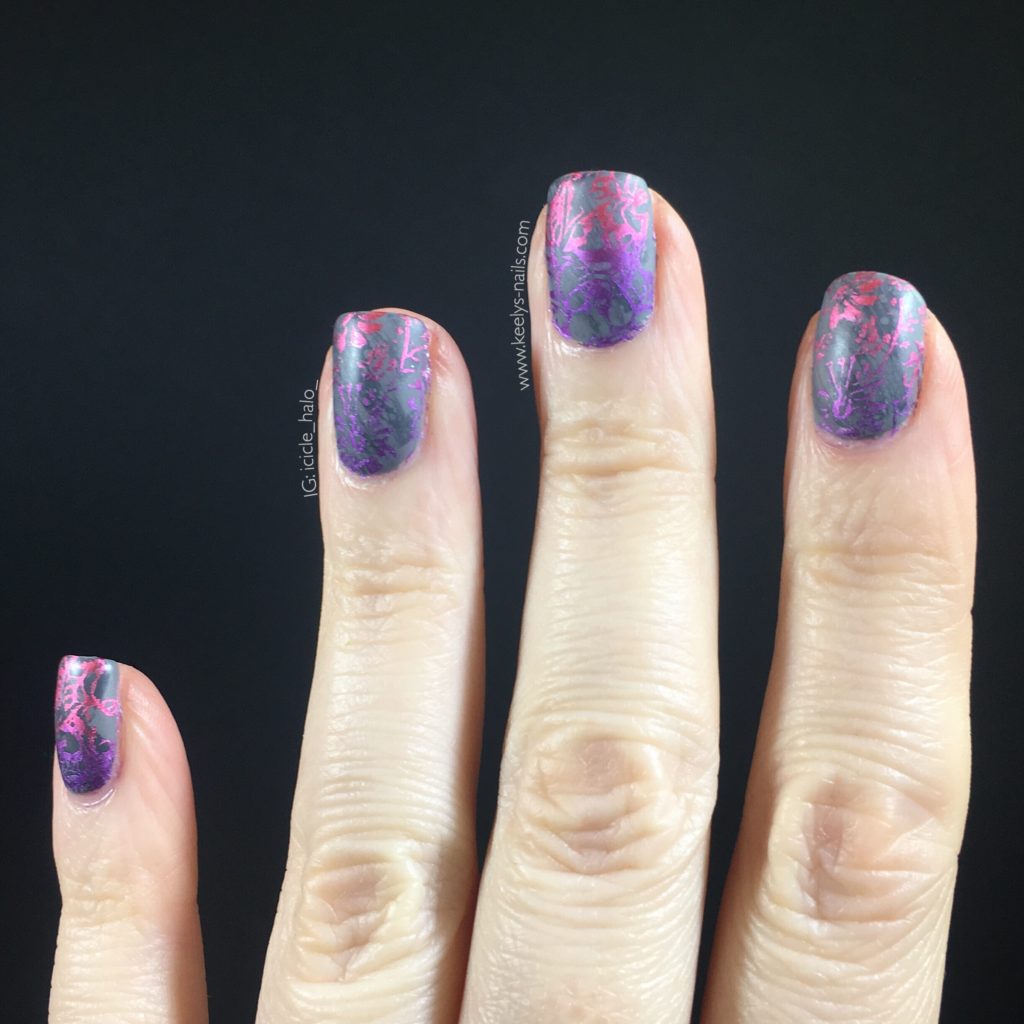
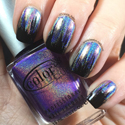
Super shorties with a matte metallic gradient
Polishes and tools
Jessica Fusion
Orly Bonder
Painted Polish Stamped in Clay
Sinful Colors Concrete Jungle
2true Aphrodite and Artemis
MoYou London Flower Power 08
Seche Vite
Rainbow Connection angled clean up brush
My base is a super subtle marbled base, using one of the Sinful Colors Transforming Top Coats. I lightly swiped it over the wet second coat of Stamped in Clay.
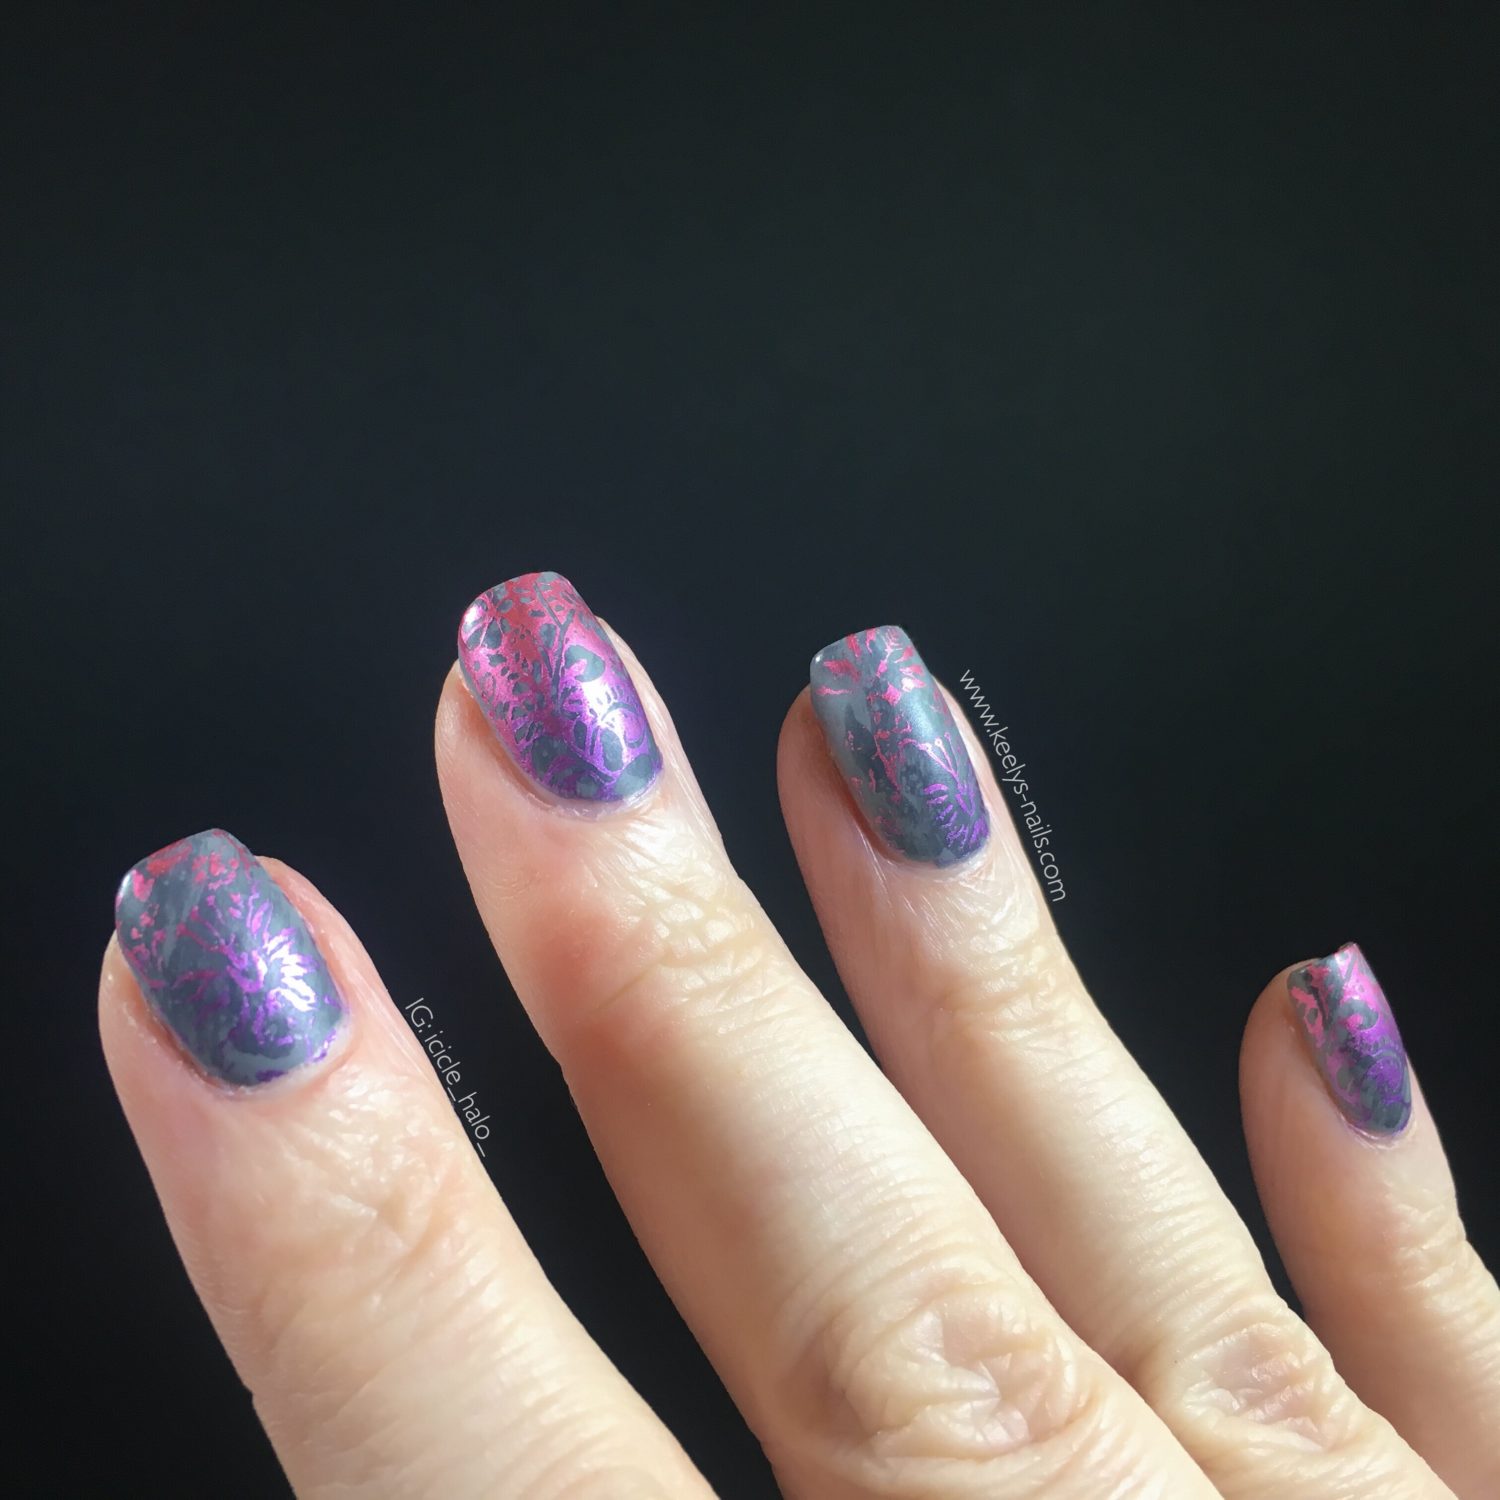
Purple to pink matte metallic gradient on a grey lightly marbled base
To be fair, it was more obvious without the stamping! I swiped diagonally outwards from the cuticle to the tip on all ten nails. If I do this again I’ll use more contrasting colours or try not to cover it up….
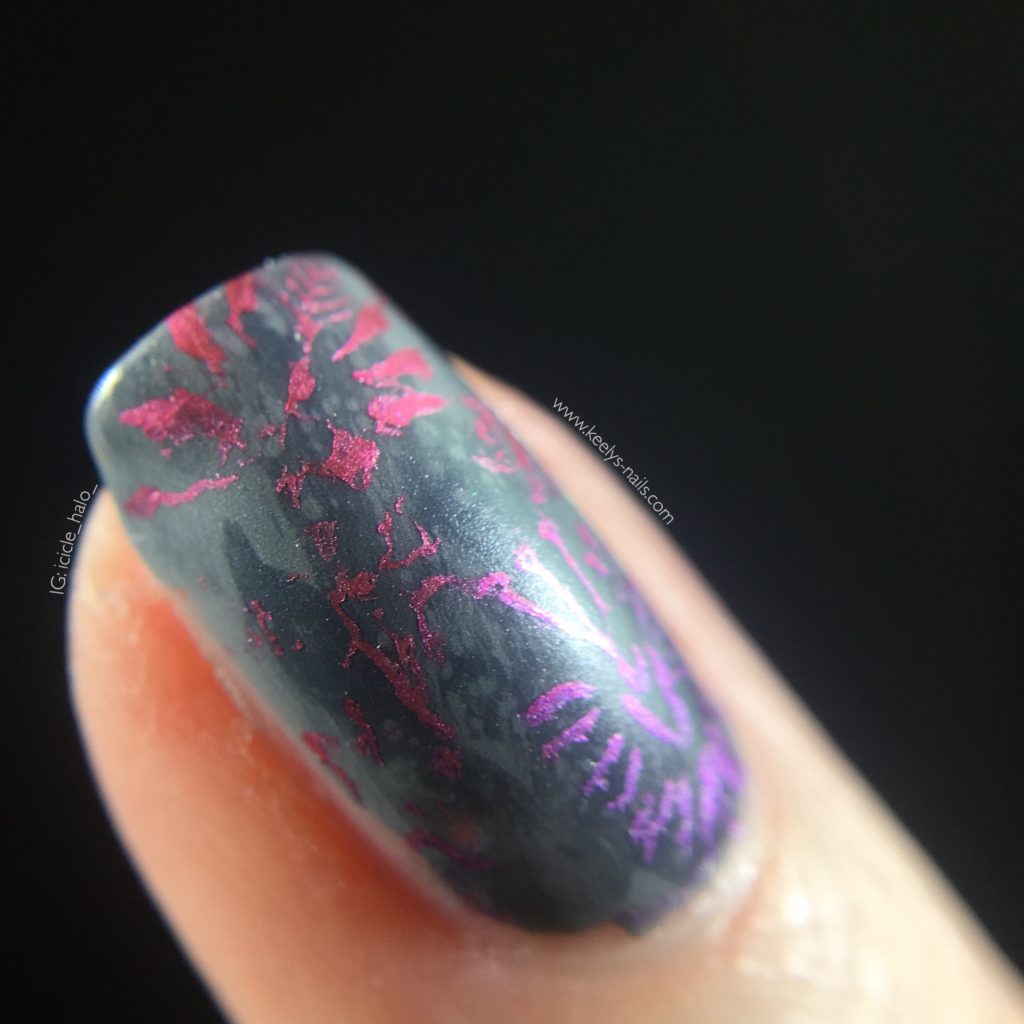
Close up look at my index finger reveals the marbling under matte metallic gradient stamping
You can definitely see the base better in my macro photos. After the base but before the stamping I added a coat of Seche Vite.
Gradient Stamping
It’s easy to create gradient stamping once you’ve got a basic technique down. After you place your colours on the plate, scrape across a few times to blend them, before picking them up with the stamper.

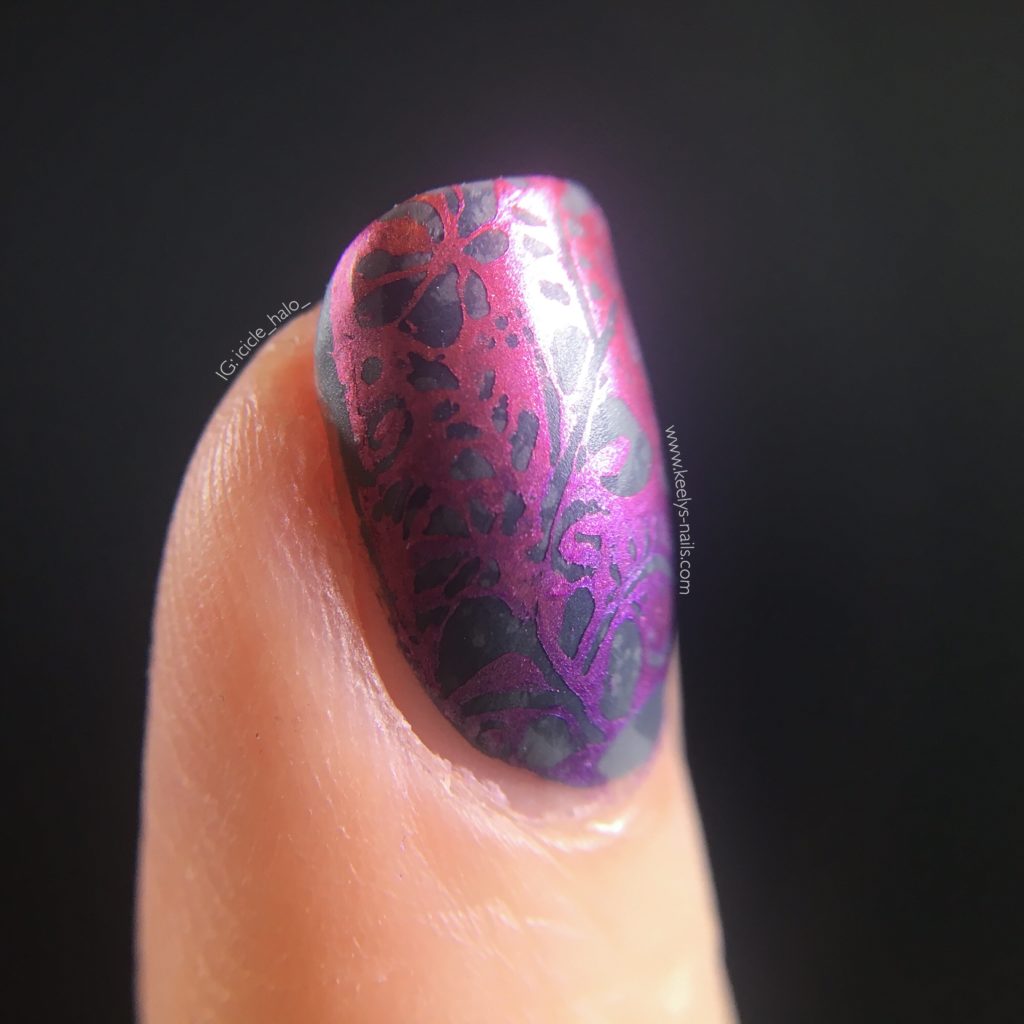
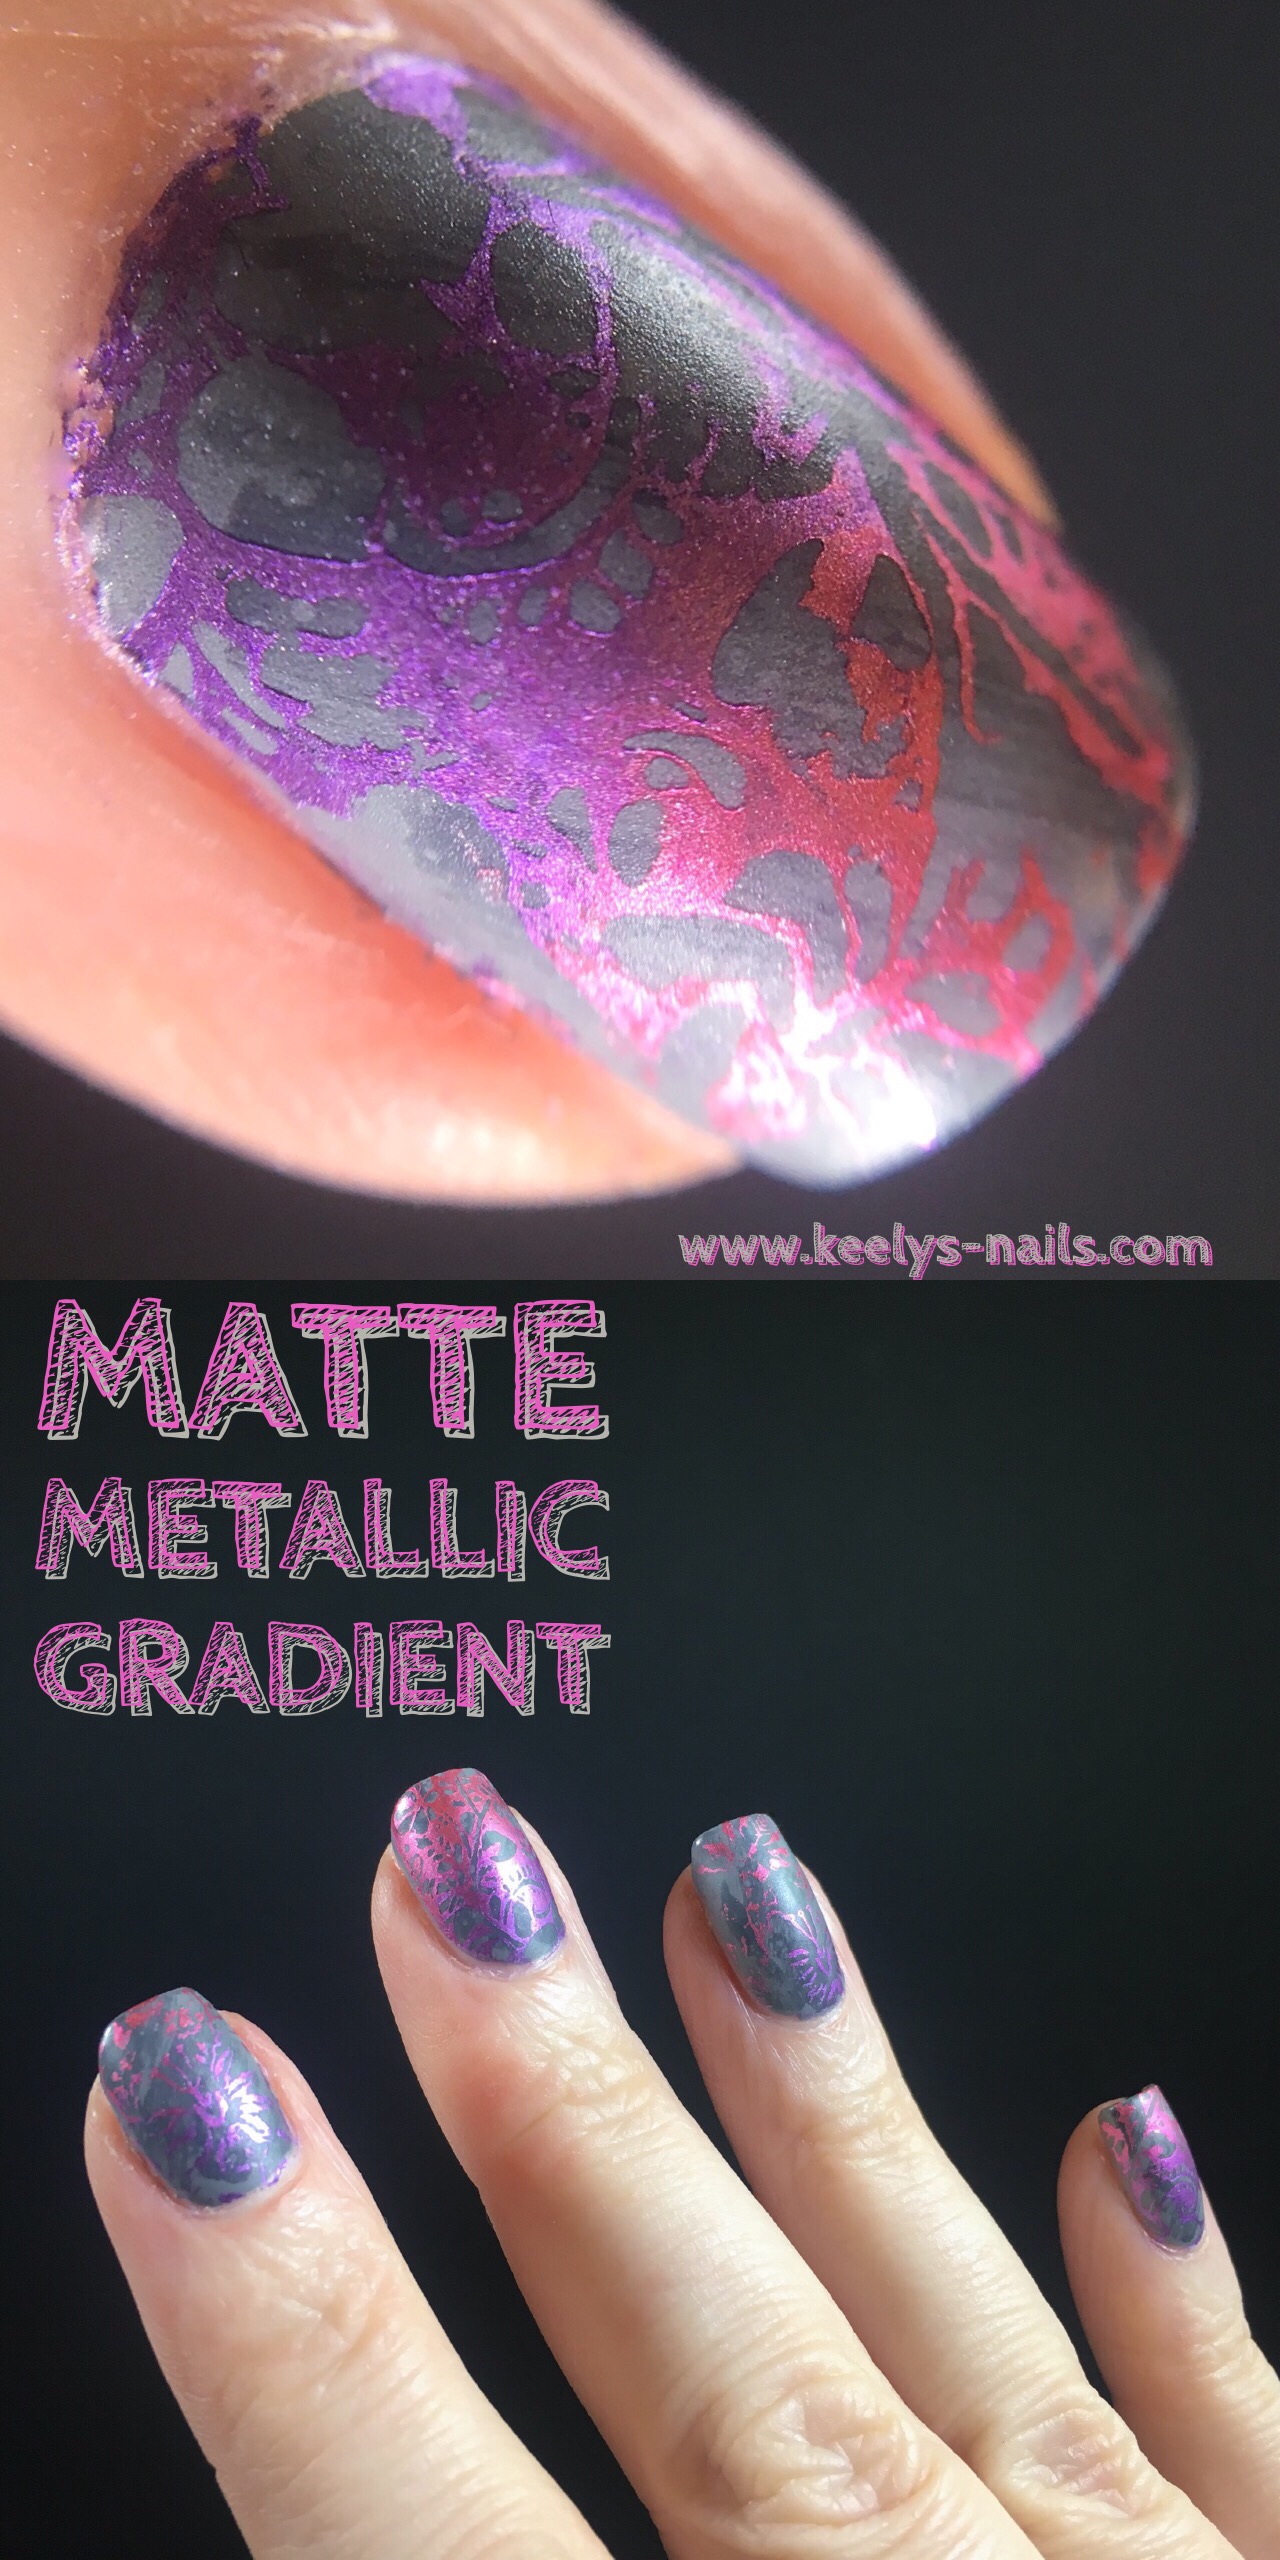
A closer look at my thumb with brocade style stamping in a matte metallic gradient
Metallic polishes tend to dry quickly when stamping, so you might prefer to start with cremes if you’ve not tried this before.
These metallic polishes are pretty old in my stash. They smell a bit funky (they always did) but are perfect for stamping. I got mine from Superdrug, and there are a few different colours.
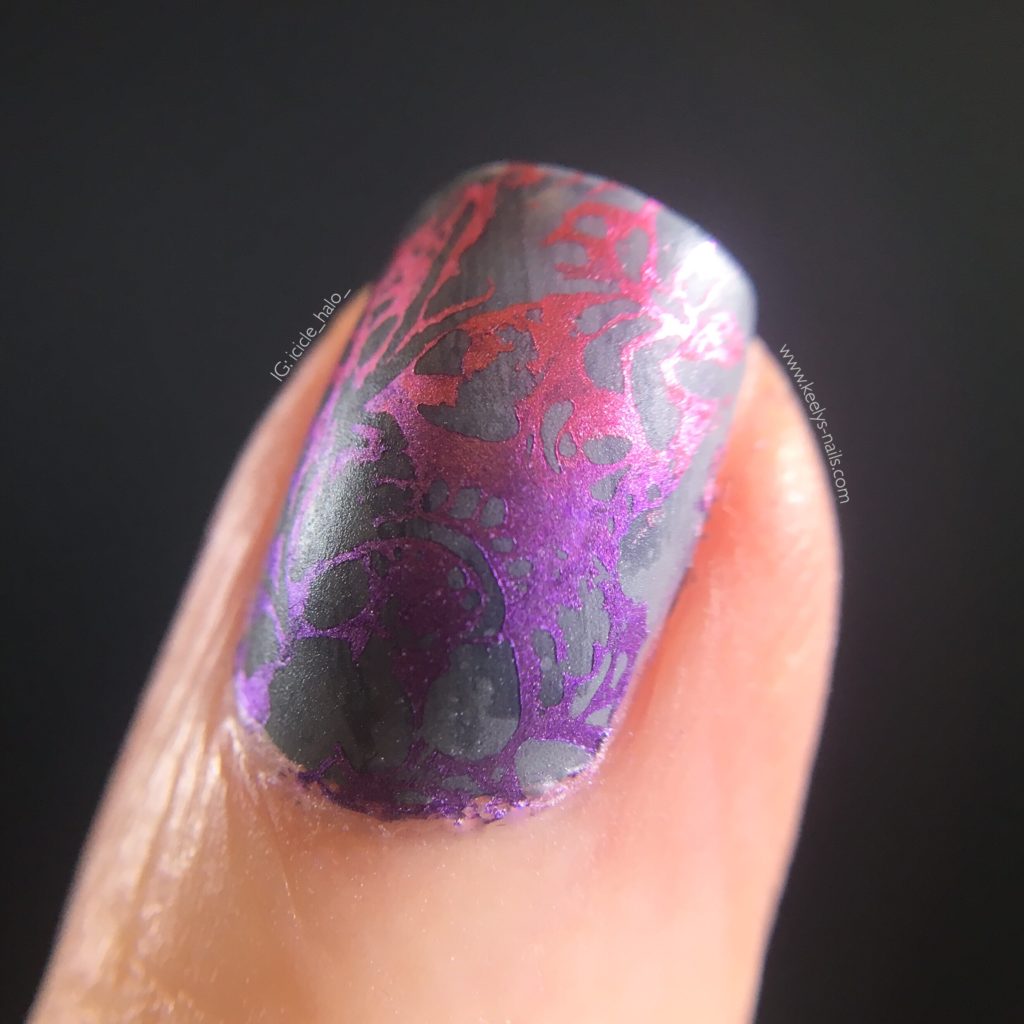
Loving the orchid colour in the middle of the metallic gradient stamping
I stamped lighter but similar designs on my ring and index fingers, so they show the base better.
After another coat of Seche Vite, I topped this design with my Rimmel matte coat. I love matte top coat on metallic polishes, they really glow through and stand out.
This macro of my ring finger really shows the base marbling using the Sinful Colors polish
If you’re using matte polish, you’ll need to top up every few days, as it absorbs oils and becomes progressively shinier!
Matte Metallic Stamping
This design is quite subtle, but it has a lot to offer on closer inspection. You could definitely amp it up by using a bigger colour contrast between the base and stamping.
A black base with a gold and copper stamp would look fabulous.
I had a fabulous vegetarian brunch of scrambled eggs, toast, field mushroom, hash brown, and confit tomato. What’s your favourite brunch spot? Tell me in the comments!
The metallic gradient still picks up the light, despite the matte topcoat