
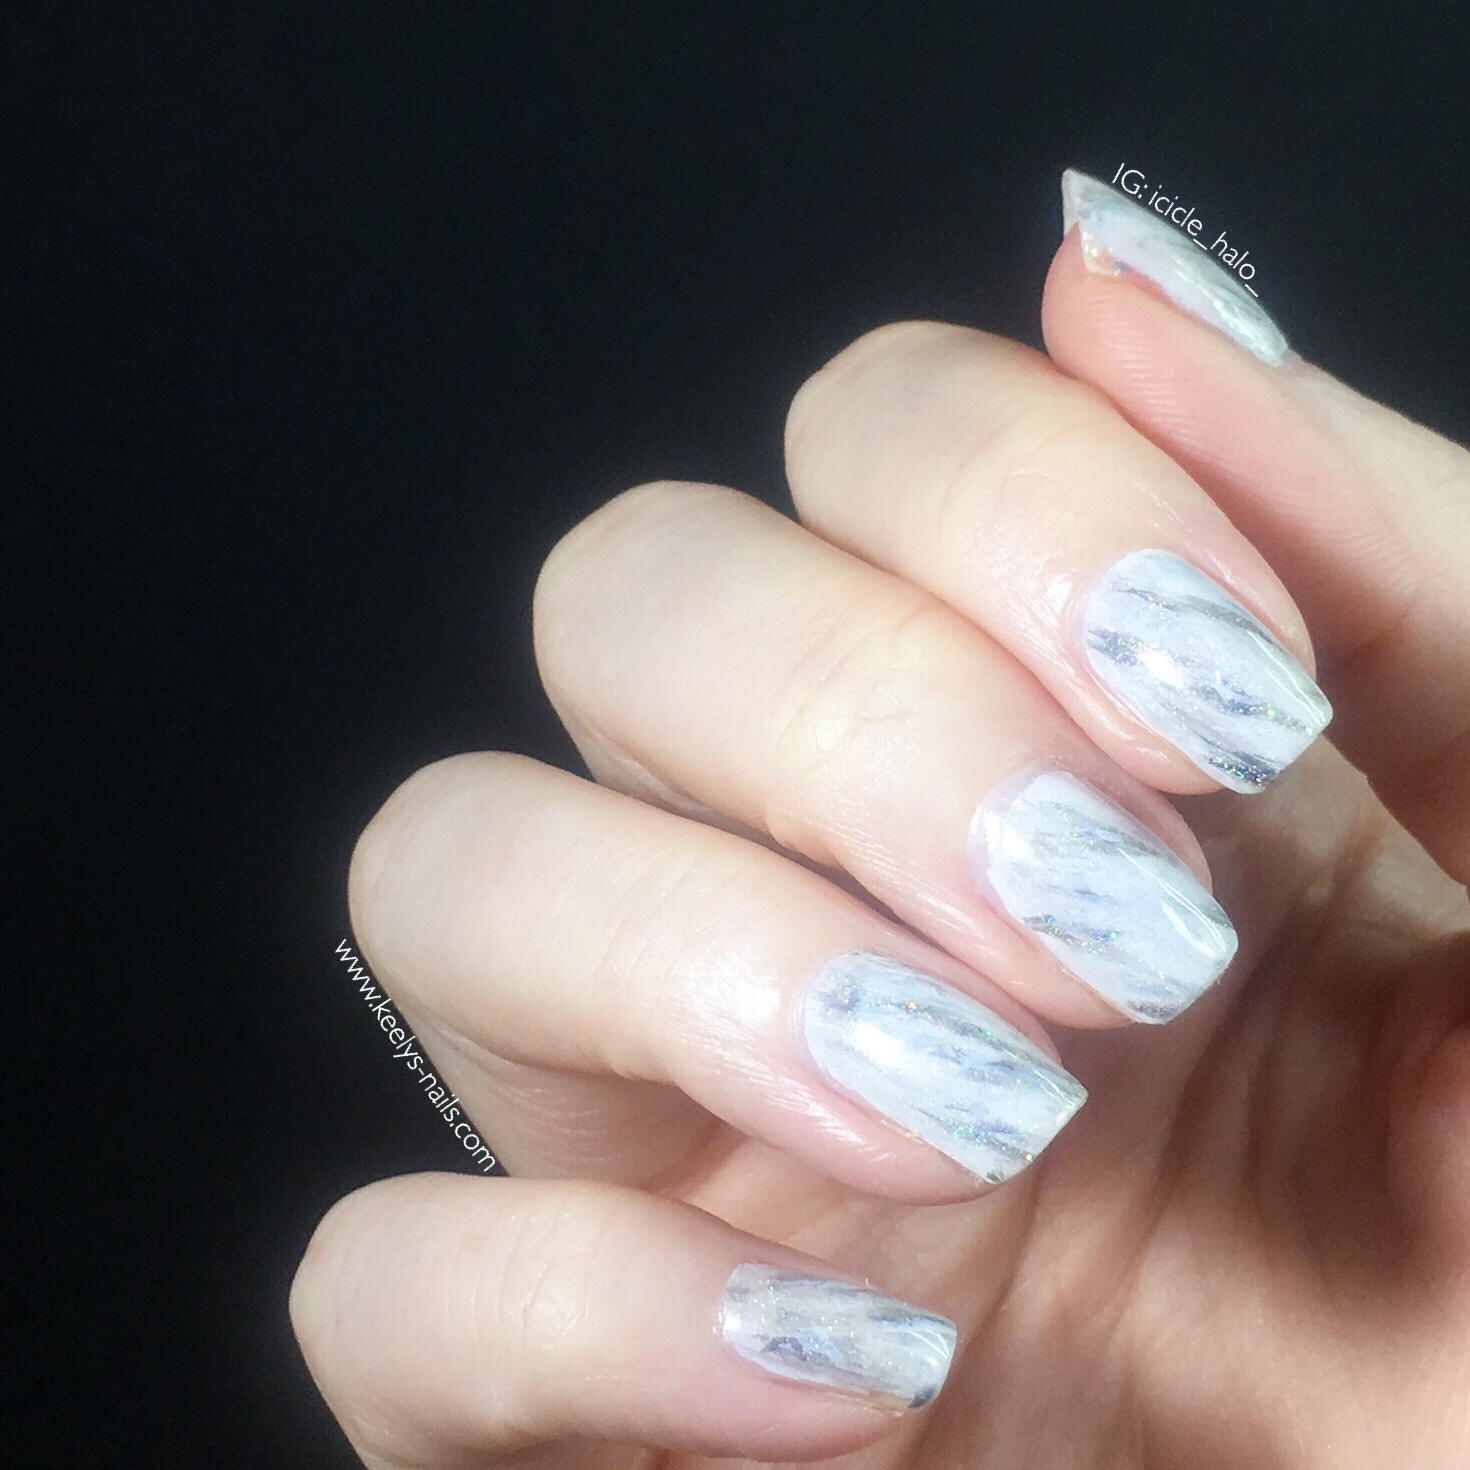
White marble backgrounds are basically a blogger’s staple at this point. But that’s for a reason, because it’s a gorgeous neutral to use as a backdrop in photos of products. I’ve recreated this pattern before using stamping, and this time I’m taking on hand painted white marble nail art.
Hand painted white marble nail art – find out how a bottle of smudge fix can make the perfect nail art tool for this design…
Polishes and tools
Jessica Rejuvenation
Orly Bonder
Cirque Carpe Diem and Page Six
Painted Polish Stamped in Clay, Stamped in Charcoal and Gray Goddess
Londontown kur Instant smudge fix
Enchanted Djinn in a bottle
Seche Vite
Nail art brush
Rainbow Connection clean up brush
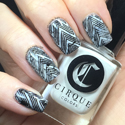
I started with one coat of Carpe Diem over my base, and then dry swiped a little light grey Page Six over it. You want to use as light a hand as possible.
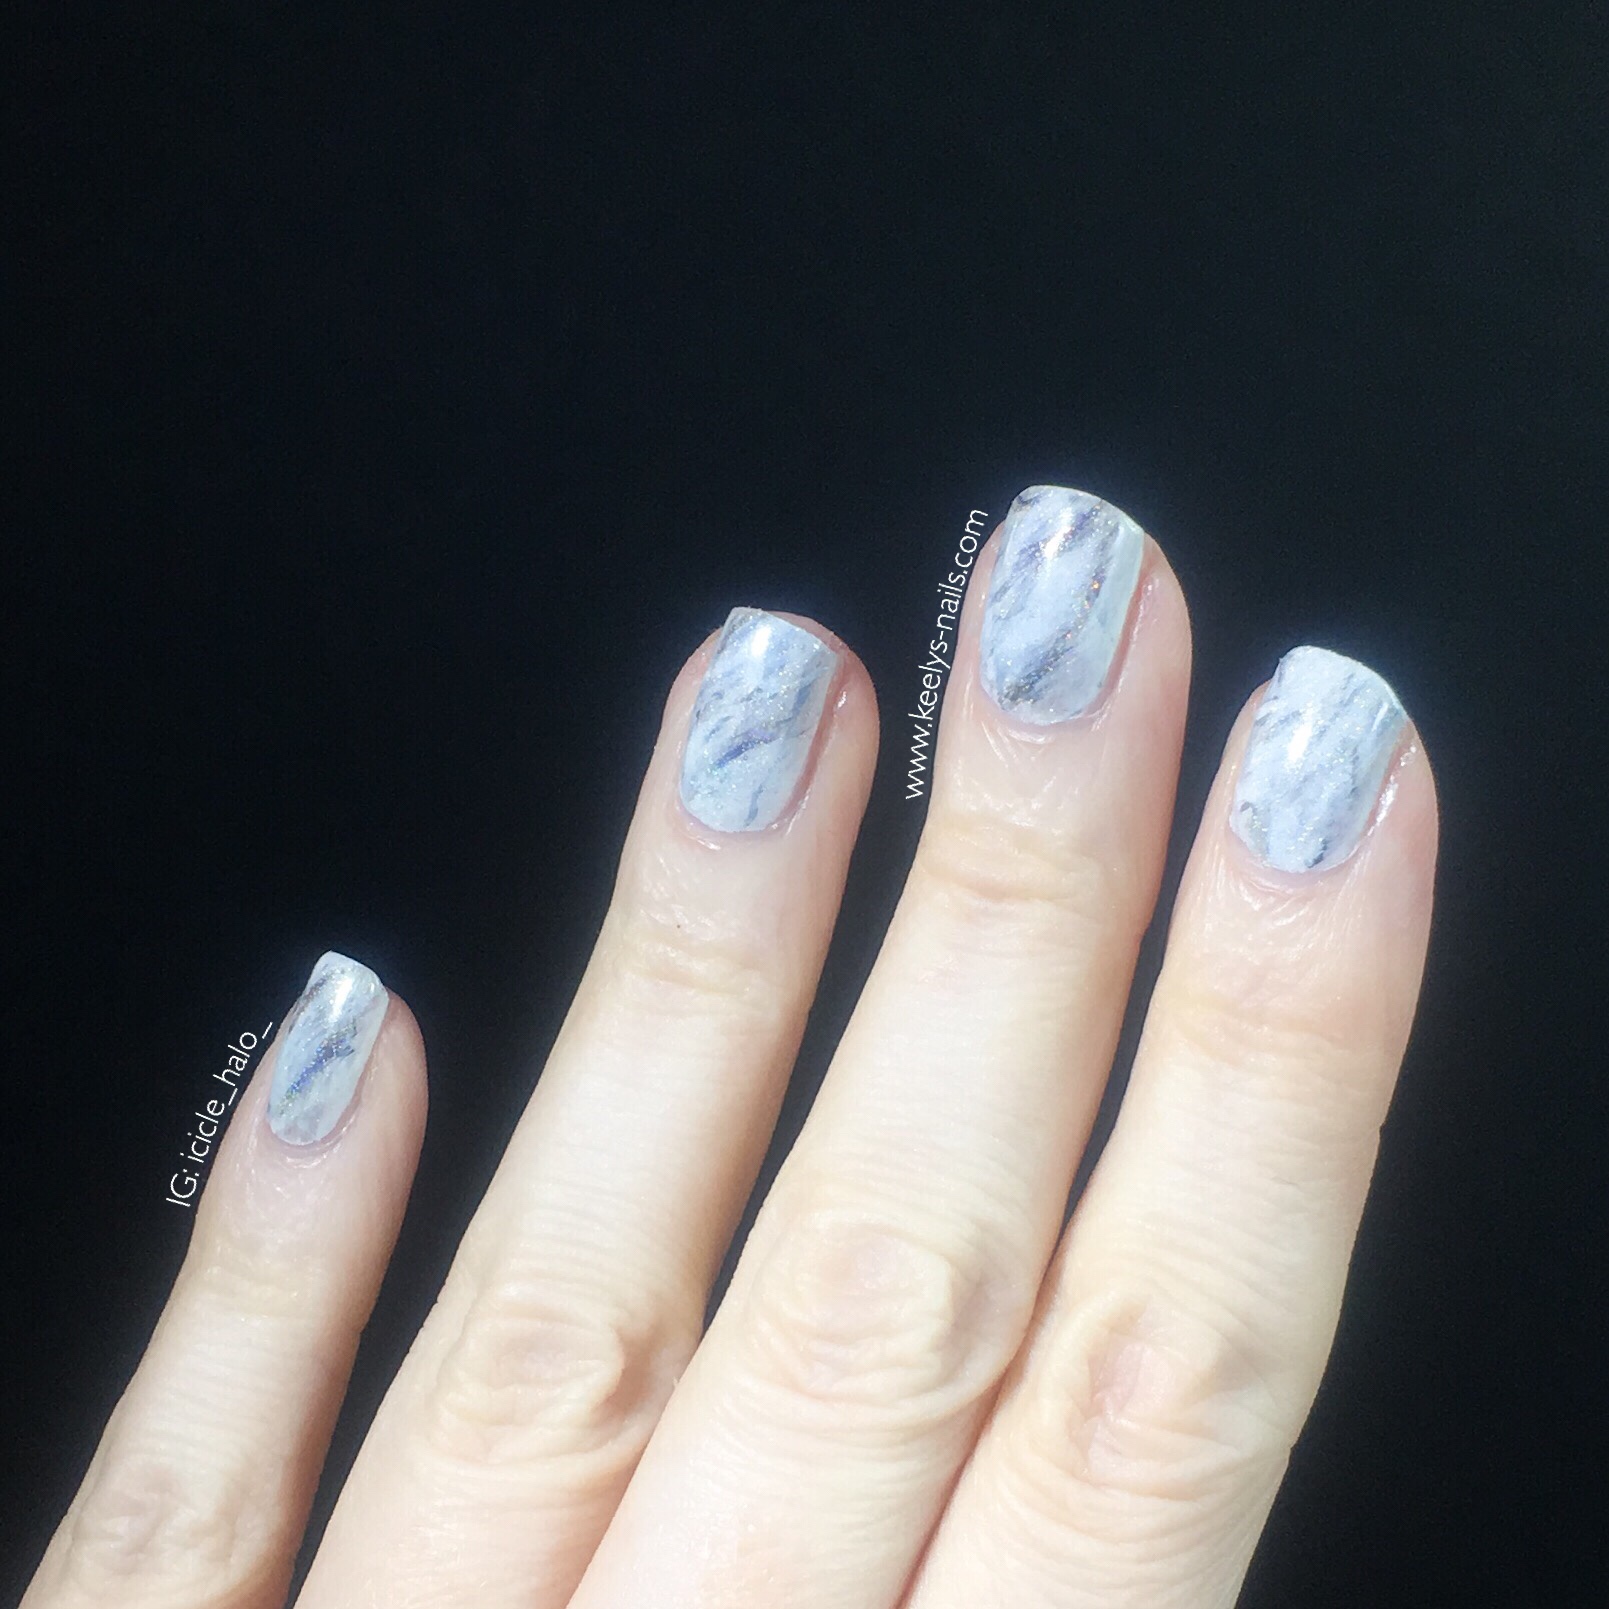
Angle the lines of the design to match across each hand for a coordinated piece of art
Next, I moved on to a slightly darker grey, Stamped in Clay. Using a long, very fine nail art brush, I drew some short-ish wavy lines across my nails. For each hand, keep the lines roughly in the same direction to keep it looking chic.
Creating soft organic lines
If you just leave the lines, they look a bit stark, so I blended them into the base using a smudge fixer polish from kur. It kind of melts the polish together and smooths it out. You don’t lose the colour, but the lines are much softer.
I repeated the process with a darker grey, Stamped in Charcoal, went back in with the lighter grey again, and then finally with a little sparkly grey polish (Gray Goddess) to highlight the lines. After each one I used a little smudge fix to blend.
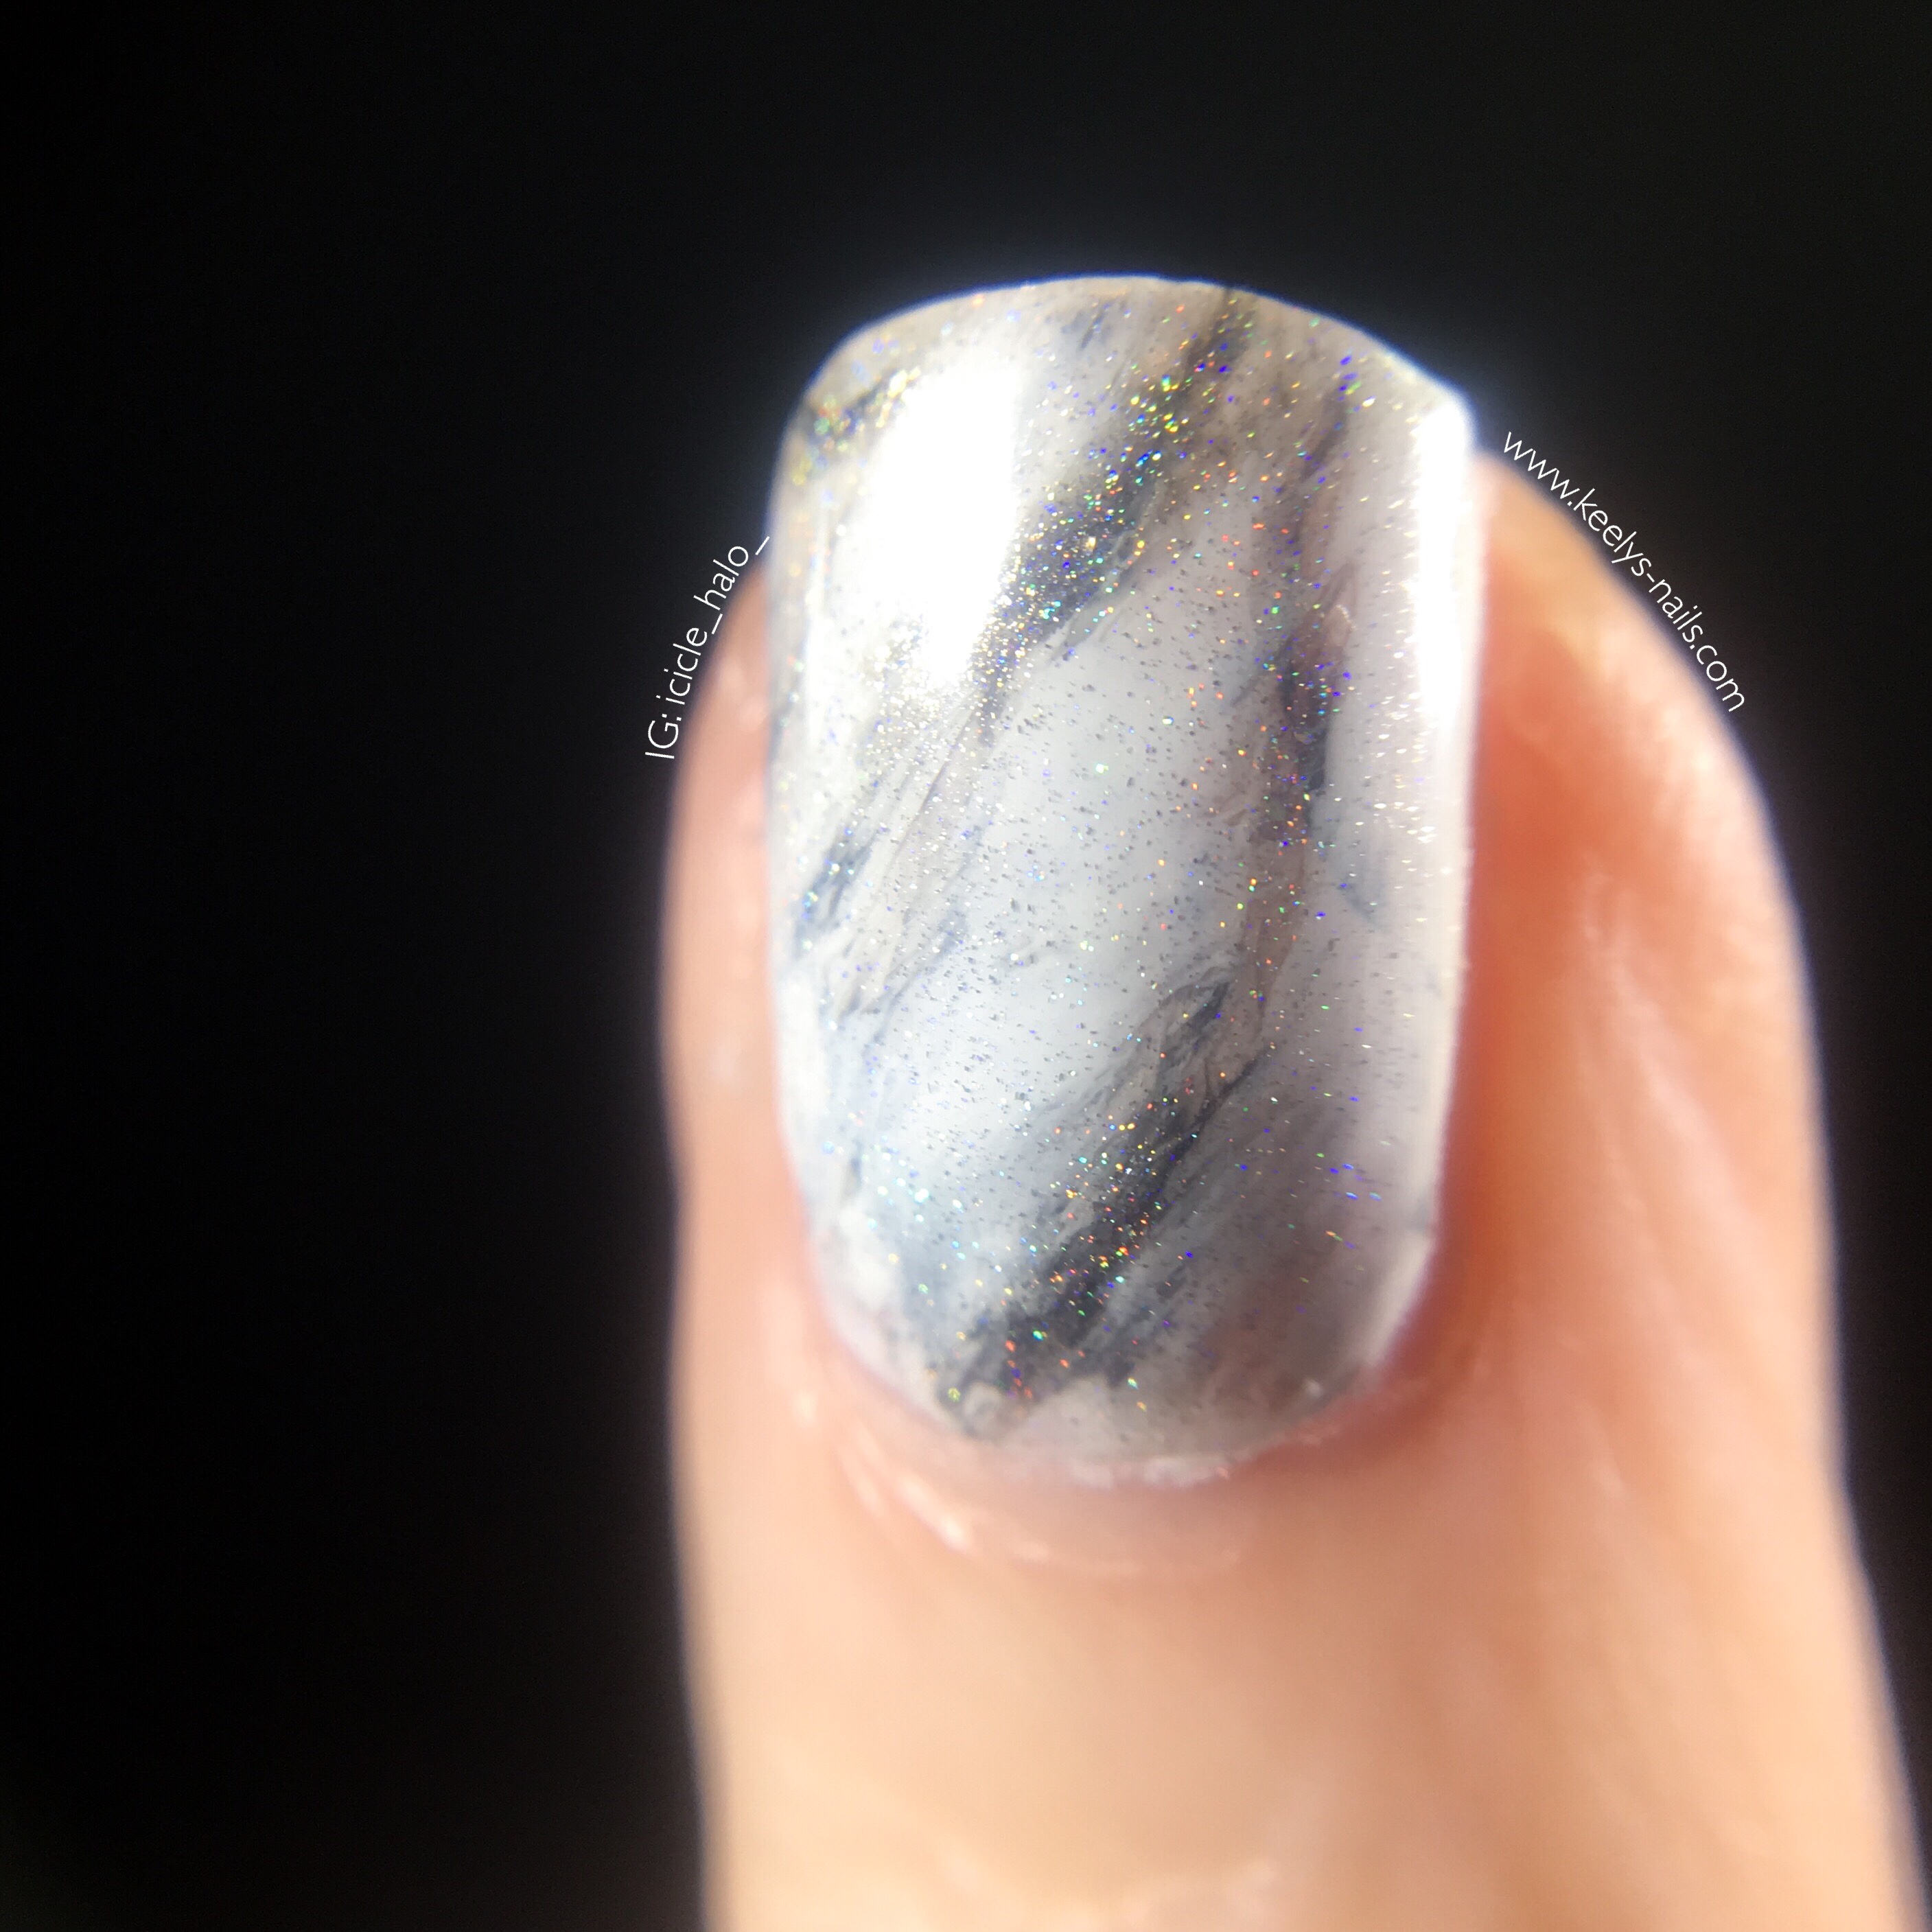
Close up you can see the rainbow effect, but at a distance it looks like the natural shimmer of marble
After top coat, my inner magpie came out, so I couldn’t resist adding a little holo topcoat from Enchanted.
Hand painted nail art
It’s been a while since I’ve used nail art brushes to create hand painted designs. If your hands are a little shaky or you’re just starting out, organic wavy lines like this are perfect to start out. They don’t need to be perfect at all! Smudges and wobbles are encouraged.
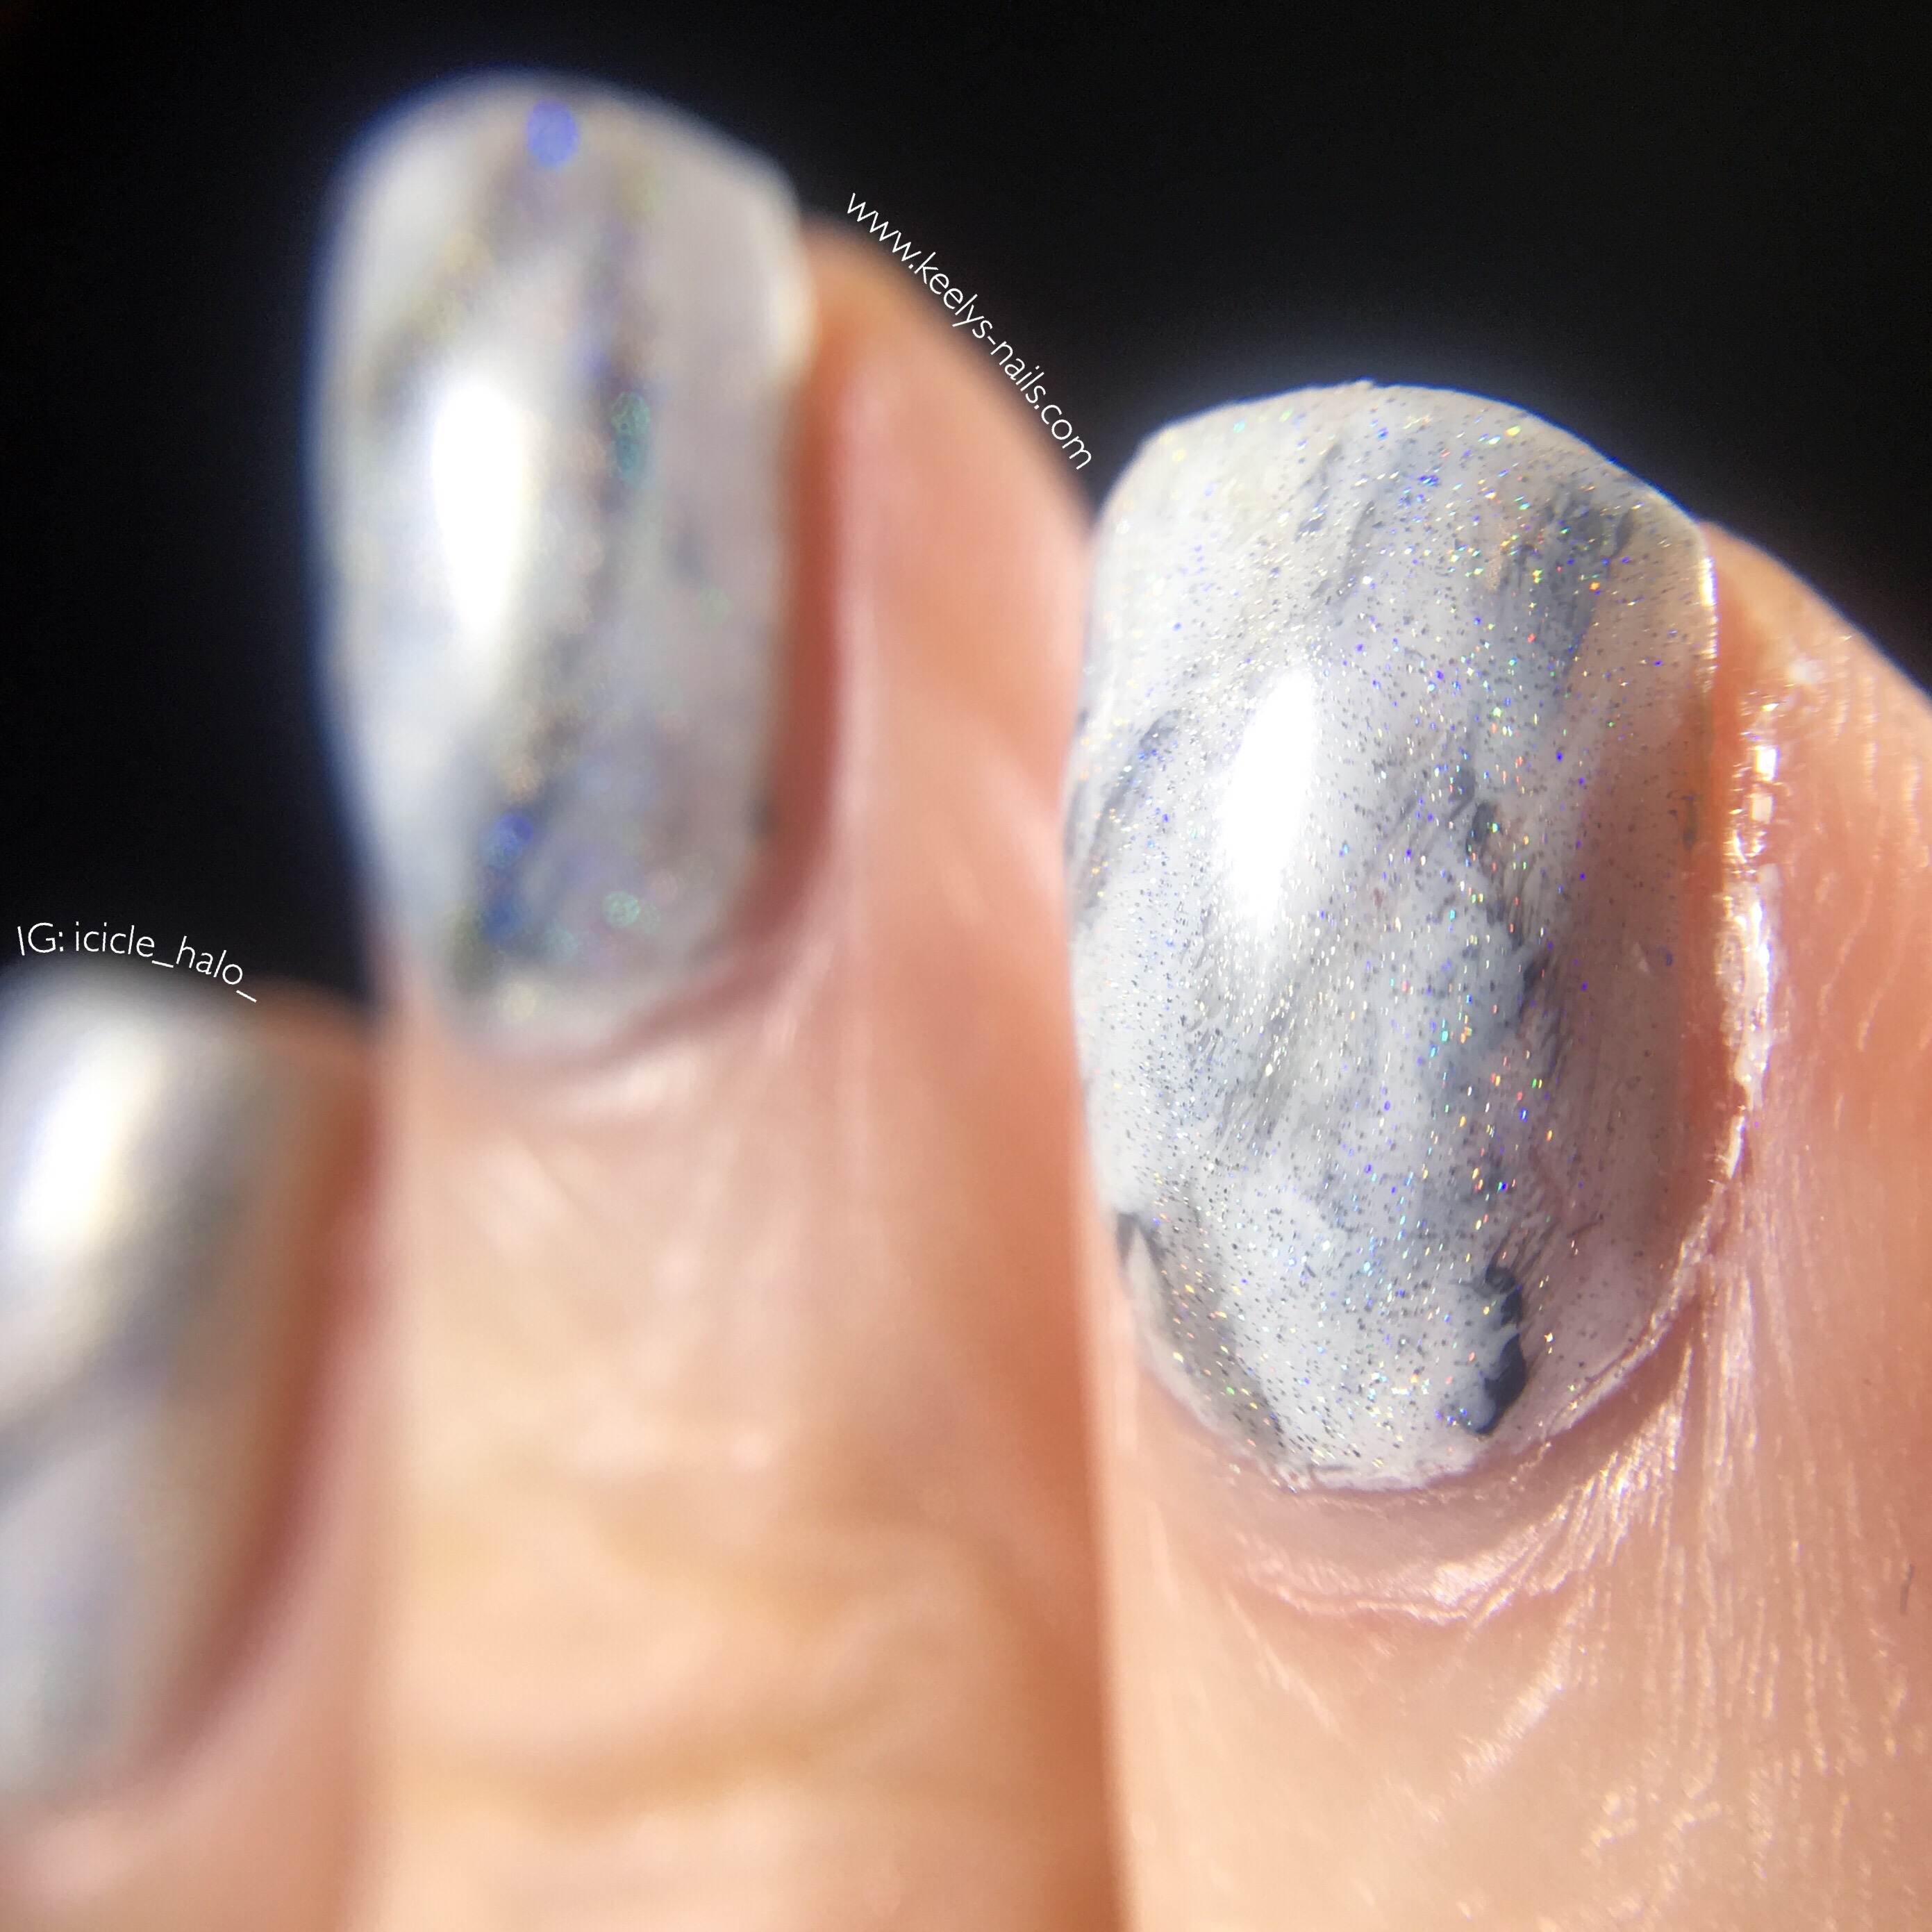
On my middle finger you can see how I focused the sparkle on the painted veins in the marble design.
August 22, 2020
Can you tell me what’s the removal process of hand-painted marble nail art?
August 22, 2020
I just painted with normal nail polish, so I use standard acetone as a remover.
January 27, 2021
Wow. This nails are awesome. Thanks for sharing this.
January 27, 2021
You’re welcome Mark.
May 10, 2021
Amazing nail art. I’ll ask my wife to try your designs. Thank you for the article 🙂
May 11, 2021
Thanks Martin, I hope your wife enjoys them too.