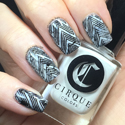
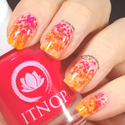
I’ve never been a big fan of striping tape, mostly because I never really got the hang of it. It never leaves the clean lines I am hoping for, it’s really fiddly and forget about using the tape itself in a design. I find it always lifts and peels off the nail, despite top coat. But, because Fabiana set it as a challenge on Nail Art Nation, it’s back for one time only. I paired it with pretty polishes to make myself feel better, aka Holographic Lines.
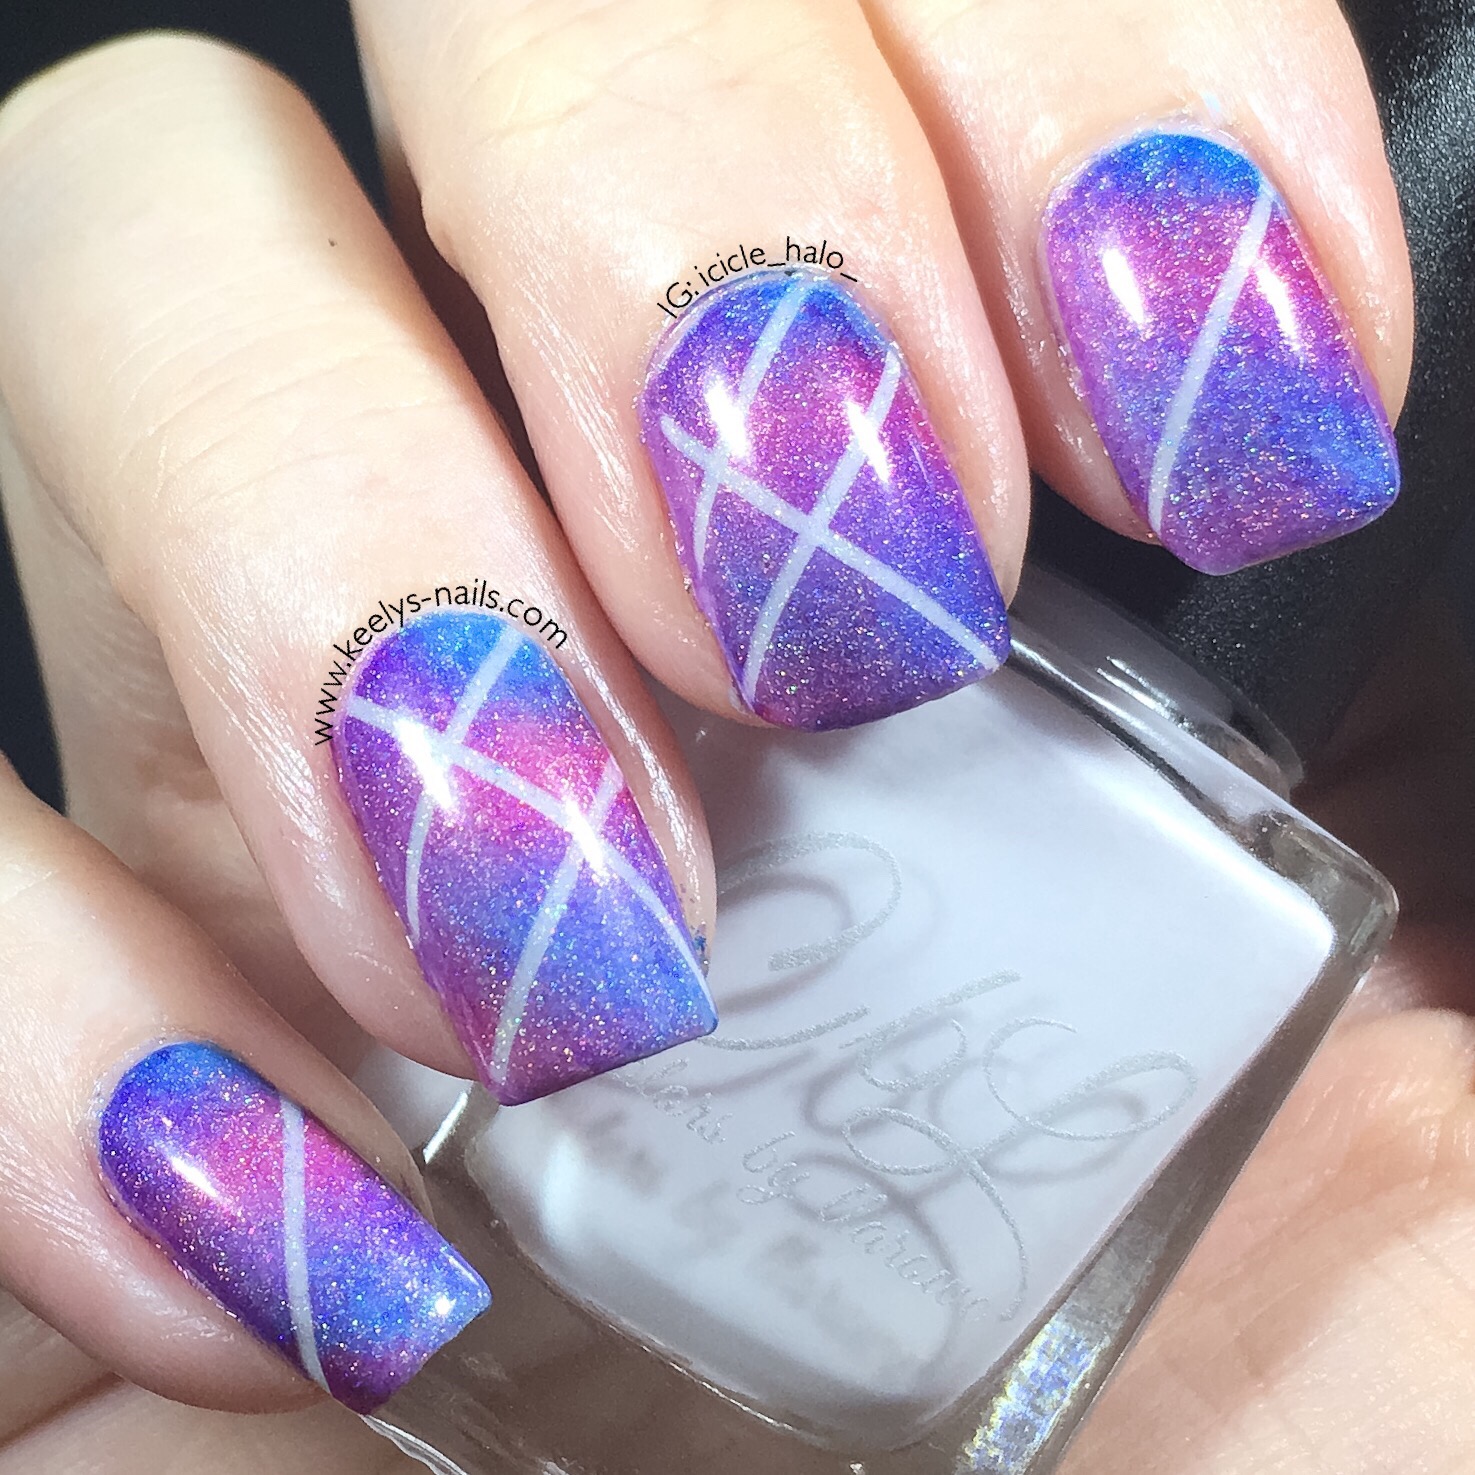
Holographic Lines – left hand with extra holo
Polishes and tools
My favourite base coat and top coat
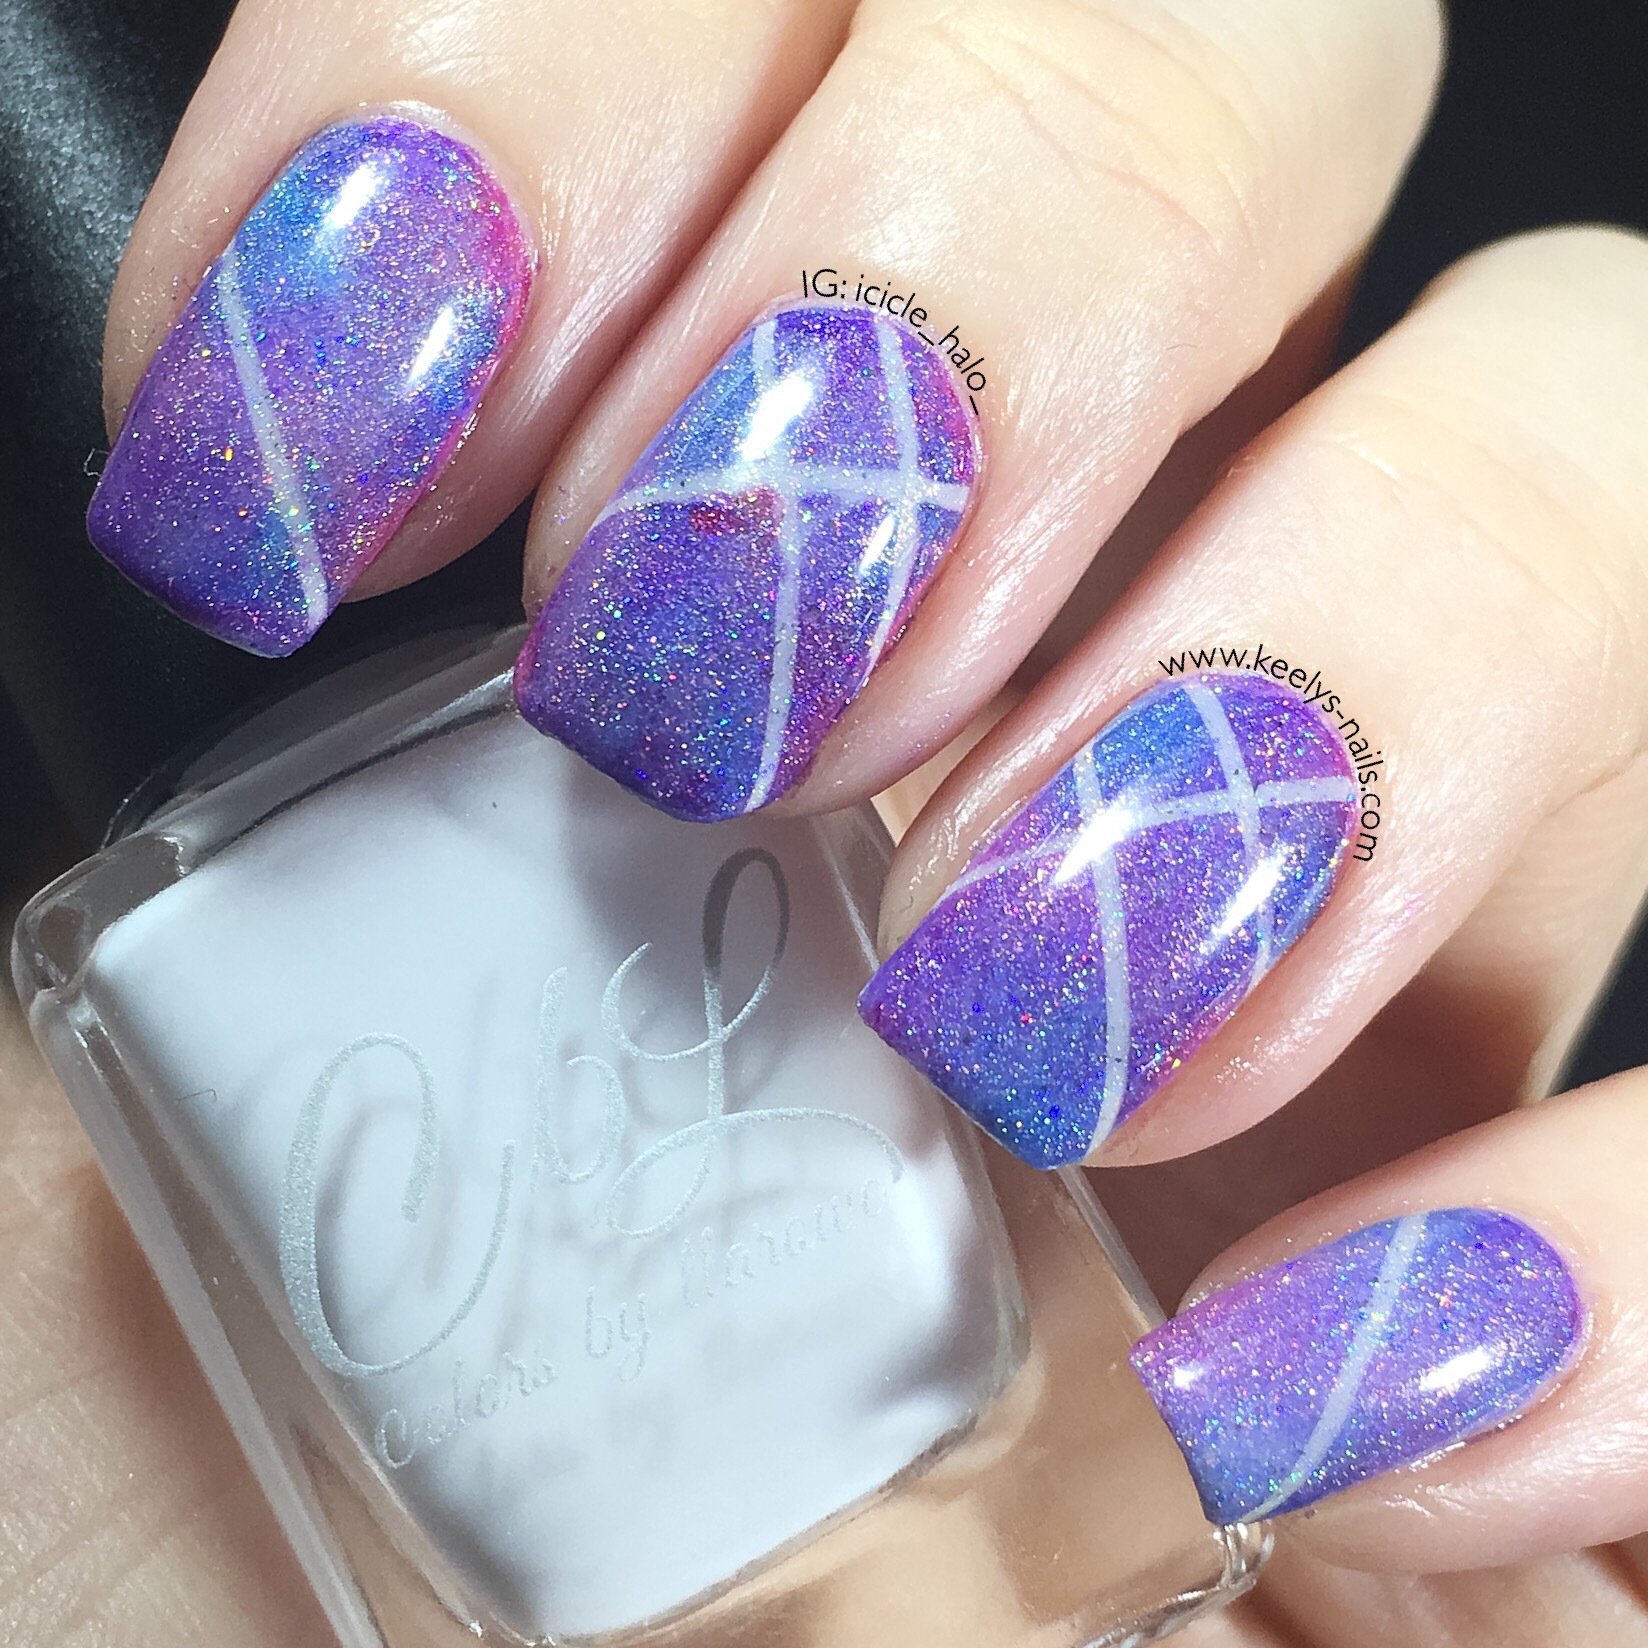
Colors by Llarowe Chasing a Unicorn duo
Striping tape
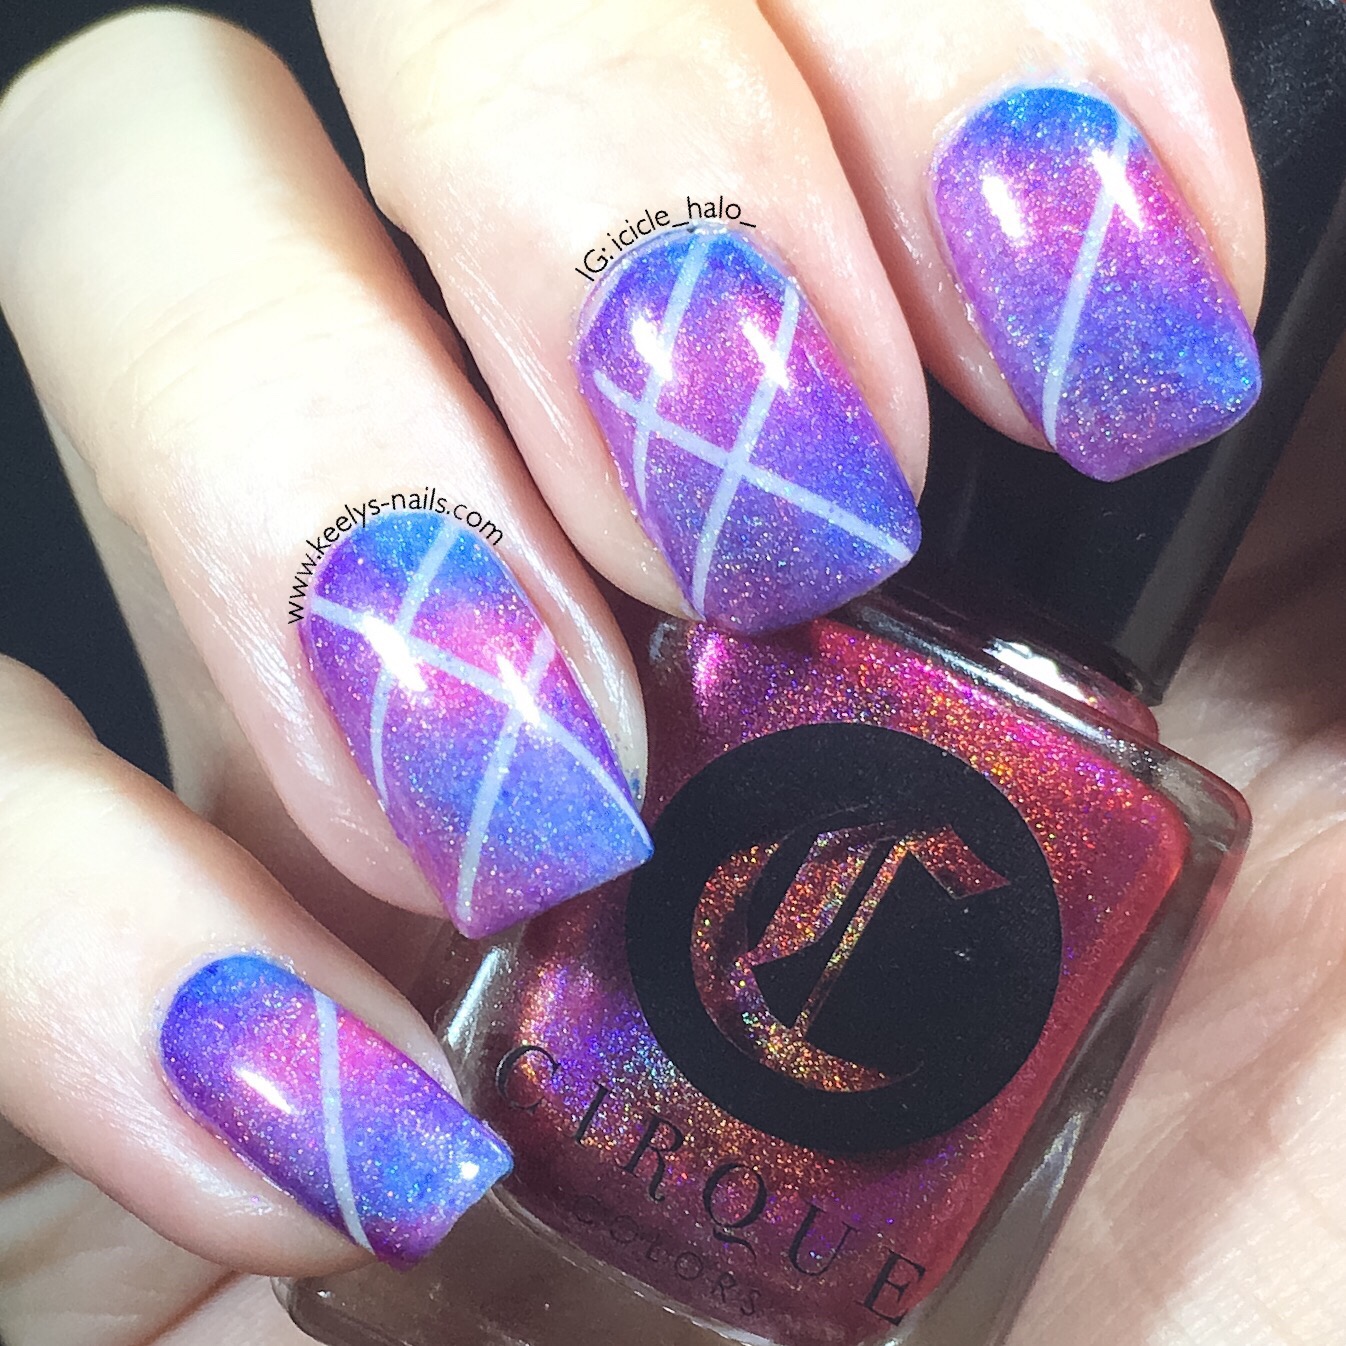
Cirque Framboise, Concord, Royal Hawaiian, and Xochitl
Latex sponge
Tweezers
Nail art brush
ILNP My Private Rainbow X
I might not have thought this through as much as I should. One of the other issues I have with vinyls and tape is that they pull off the base colour when you peel them off. In hindsight, using a base that needed four coats was just asking for trouble.
I think I got lucky though. I’m not sure if it was the tape being less tacky than vinyls, or the 30 minutes I waited after top coat before using the tape, but it didn’t lift at all. It’s a miracle I tell you!

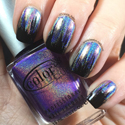
Holographic Lines – right hand with Cirque Framboise
After base coat (Nailtiques formula 2 today), I used 2 coats of the colour correcting base coat from the CbL duo. This one is really thick! Each time I use it I think I should add thinner. But then instantly forget.
After that I used two coats of the holographic bottle of the duo. Perfect polish, not too thick or too runny. After top coat I settled in to watch the second half of Supernatural!
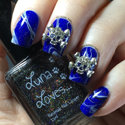
Holographic Lines – left right with Colors by Llarowe bottle. Extra holo? Maybe?
Striping Tape
Once it was all set hard, I admired it briefly and started cutting up pieces of striping tape. Always cut it longer than you need, it makes it easy to grab it with tweezers later to peel it off.
I was going to add more lines of tape, but kept it simple more for speed than anything. It was already getting a bit late!
I painted on blobs of the four Cirque colours to a damp latex sponge, and started dab-dab-dabbing over the tape. These polishes only needed two coats – win! Pull the tape off quickly when you’re done, to keep the lines neat. Also try to remember what order you put the tape on, to avoid mucking it up, unlike me.
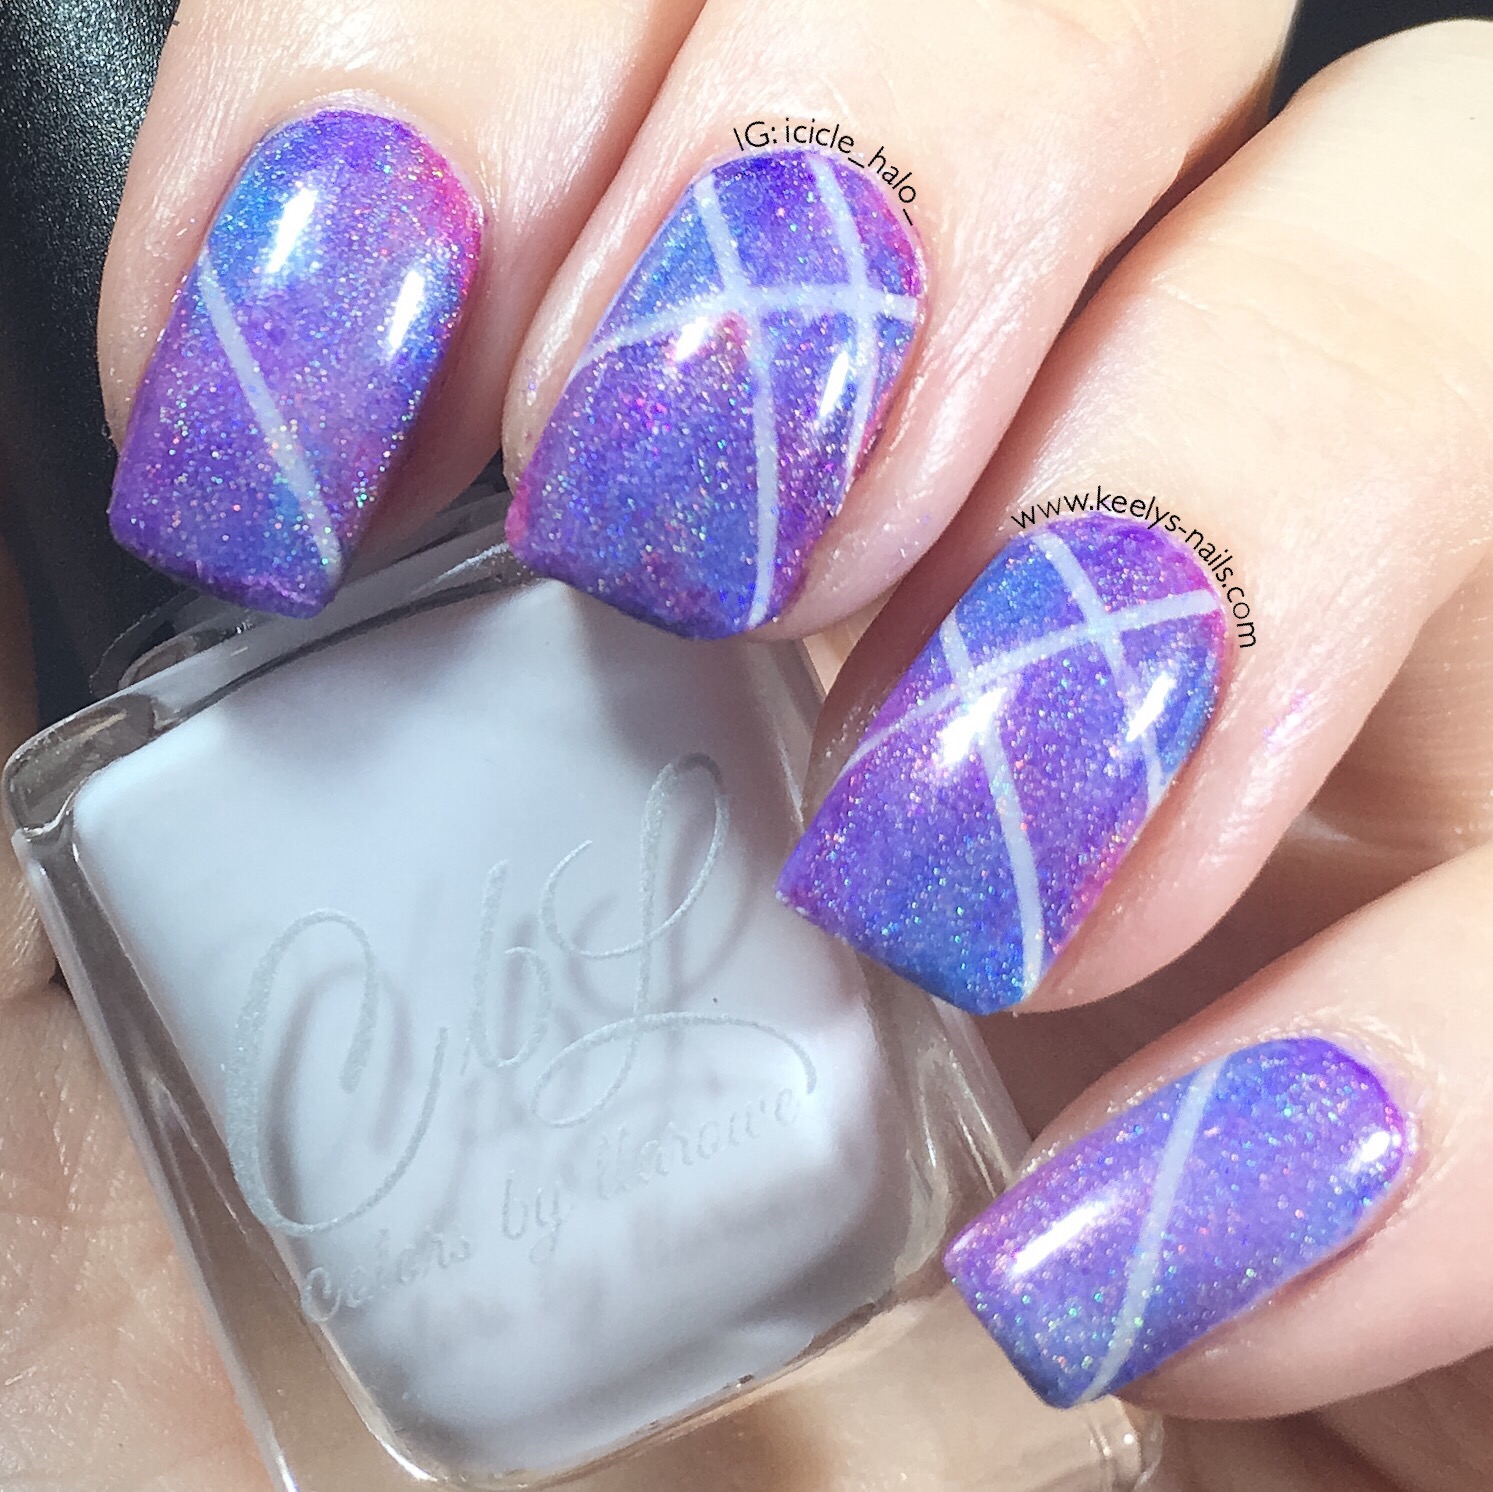
Holographic Lines – left hand with Colors by Llarowe bottle
To fix my mistake I used a small brush dipped in Framboise to fix the spot that pulled off. I used that same brush dipped in acetone to fix a couple of spots where the polish had bled. This was mostly right in the sidewalls of my nails where it’s difficult to make the tape lie flat.
Choose a brush that is no wider than your tape, so you don’t accidentally ruin your design.
Holographic Lines
After I was done, I added another layer of top coat. I took photos, but couldn’t decide if the CbL or Cirque bottle looked better (so you get both).
Then, I decided it wasn’t sparkly enough and added a coat of ILNP. And more top coat. And took more photos. However I now can’t tell which ones are the extra holo ones, so maybe it wasn’t needed after all…
I think that means I’m wearing 11 coats of polish now. A tenth of the way to polish mountain! It looks ok somehow. I will be disappointed if I get much tip wear with that much polish on!

Holographic Lines – left hand with Cirque Framboise
August 20, 2016
Whoo these look stunning! You are so creative 🙂 love these..
August 20, 2016
Thanks Claire! I was nervous about these, not sure it would work 🙂
August 20, 2016
Loving these!
I’m useless that nail art! I’ve tried so many different styles and it never looks right.
I’d love to achieve these 🙂
August 20, 2016
You’ve got to have patience with tape. Sadly I have very little which I think is why I don’t get on with it! But the sponging gradient part is easy, you should try that 🙂
August 20, 2016
Looks great. You are very talented. I can’t even do a French tip.
August 21, 2016
Thanks Claire! I’ve never really mastered a French tip either. It was all I wanted at about 20, before I got into the nail art side of things
August 21, 2016
I love the galaxy kind of effect this has! This post is making me think i definitely need to stop biting my nails!
August 21, 2016
Thanks Dana! It definitely has that galaxy look to it.
August 21, 2016
Whoa – that’s so cool. I absolutely love it – must’ve taken a long time to complete 🙂
August 26, 2016
Thank you Savi! It wasn’t too bad but would have been quicker if I’d made better polish choices
August 22, 2016
These have come out so well and I love the holographic nail polish you’ve used x
August 26, 2016
Thank you Rhian I love picking holo polishes in sunny weather.
August 22, 2016
Wow this is stunning. I wish I could do my nails like this.
August 26, 2016
Thank you 🙂 it’s a bit fiddly but very achievable!
August 22, 2016
What a really clever idea and it works so well x
August 26, 2016
Thank you Rachel!
August 24, 2016
Wow I love them and the colour you choose! They are stunning, would love to have my nails done like this.
August 26, 2016
Thank you Anosa! I don’t often use pink shades but I love the combination here
August 27, 2016
Love these colours!
August 27, 2016
Thanks Kara!
August 29, 2016
Those nails are beautiful, I would never have the patience to do that and usually don’t have the time x
August 30, 2016
Thank you Viki this was a bit time consuming but there are definitely designs that are very quick and easy. Have a look at water decals for instant nail art