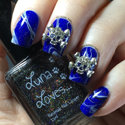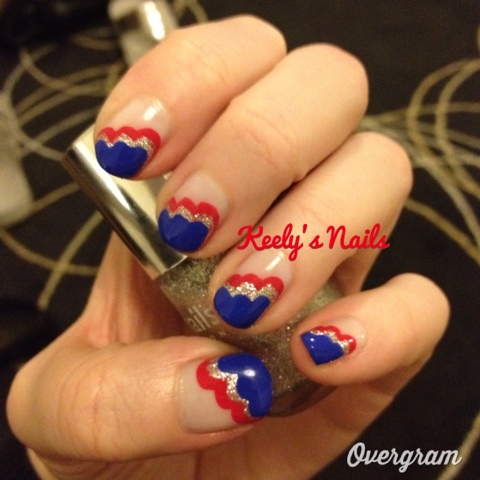
Red, glitter, blue – easy cloud manicure
This is a really easy manicure to do yourself – you don’t need any extra tools, just a few contrasting nail colours and the brushes they come with.
I created this during the Olympics earlier this year, hence the patriotic colours.
Start off with a clear base coat – part of this will be visible, so if you have yellowed nails give them a scrub with some whitening toothpaste to get rid of any stains – alternatively you could use a neutral nude colour or a contrasting base colour – white would look good with this colour combination.
The next step is with your first colour – using the brush (make sure its not overloaded with polish) start a stroke about three-quarters of the way up your nail (closer to the cuticle than the tip). Paint down as if you are painting your nails normally, with a straight stroke along one side of you nail. The shape of the brush will create the first scallop – add a little bit of pressure if you want your brush to fan out slightly. For my first colour here, I used Essie in Watermelon, which is a pink-toned red.
The next stroke with the same colour starts next to the first one, approximately in the centre of your nail so it is slightly closer to the tip than the first. Again run your brush straight down, adding pressure if you have a narrow brush to create the rounded shape. Repeat slightly lower for the third stroke, which should meet the other side of your nail bed. As only the rounded scallop will ultimately be visible, if your polish is a bit streaky or uneven, it doesn’t matter, because you are going to cover it up with the next polish. Wait for it to be touch-dry before moving on to the next colour.
My second colour was Nails Inc Electric Avenue – a dense sliver glitter that is pretty much full coverage in one coat. The process is exactly the same as before, just the start point on the nail is slightly lower to show the red. Three strokes – I found the narrower brush in the Nails Inc polishes needed a bit of light pressure to fan out and create the scallops. Again, wait for the polish to dry before moving on.
The third colour I used was Nails Inc Baker Street which is a lovely royal blue. Polish is applied exactly the same as before, just with a lower starting point. I touched up a few places with a second coat of blue where the glitter was showing through before adding a coat of Seche Vite.