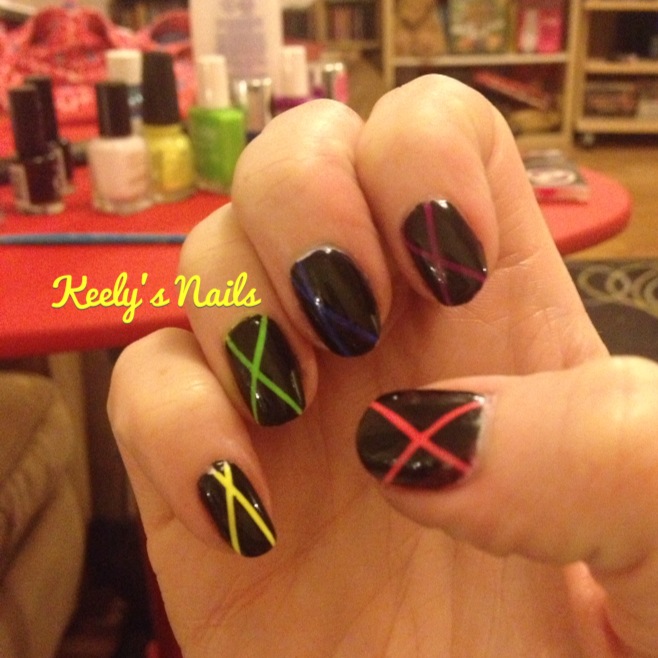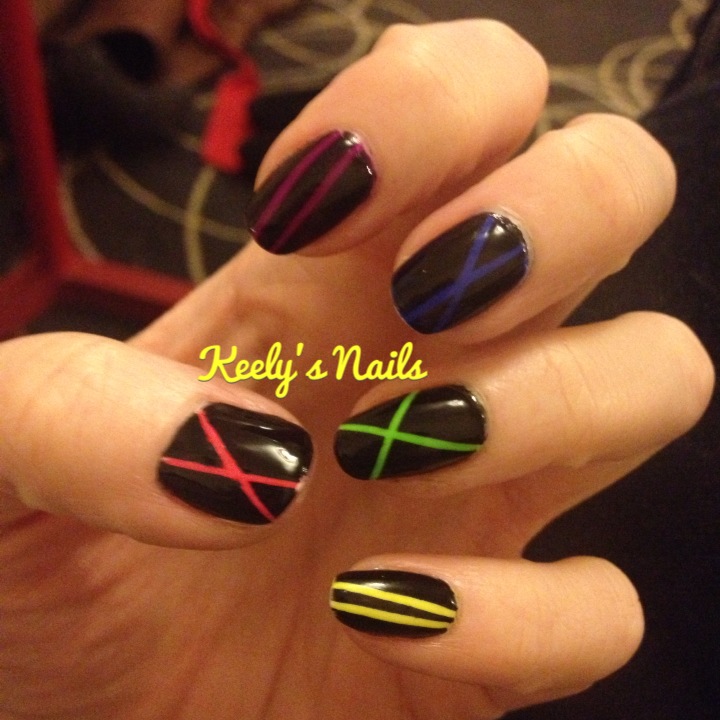
Neon Stripe Tape Mani
I’ve never used striping tape to create a manicure before, but it promises thin, clean lines which are almost impossible to draw by hand (certainly with any consistency when working on myself!).
You can use tape in two ways – apply the tape on top of polish to create straight lines; or apply it in between polish layers and use it like masking tape to reveal stripes of nail colour underneath. I went for the second option in this design, and made use of my brightest polishes under black top coat.
Using neon polishes has it’s own challenges, and it’s best to start with a white base coat to really make the colour pop. I used Barry M matte white, then a layer of Hard as Wraps to make the design long-lasting.
The neon colours I used were (all 2 coats):
Nails Inc Notting Hill Gate
American Apparel Neon Violet
Nails Inc Baker Street
American Apparel Neon Green
China Glaze Yellow Polka Dot Bikini
Next up a layer of Seche Vite and plenty of drying and setting time. Don’t even think about rushing at this stage, or your tape will just pull off all your polish and base coat and all your prep will be wasted. I have zero patience, hence my love of Seche Vite, but even with that you need to give it at least 45 minutes.
Next up, apply your tape. If you are crossing it over, pay attention to which piece is on top, as you’ll need to remember this when you remove it! Leave a bit of tape overhanging at at least one end so you have something to grab to remove it. I painted the black top coat using Rimmel 60 second colour in Black Out – it’s completely opaque in a single coat which is what you need here. Make sure you cover all the base colour right to the edges and cuticles.
While the polish is still wet, peel off the tape to reveal the base colour. Don’t wait for it to dry or you won’t get a clean line revealed. Then, you need to wait for a bit more drying time before topcoat, as the last thing you want is to bleed the top colour onto your nice clean lines. Although, if you’ve used a good topcoat in between you can run a small brush dipped in acetone along the lines to clean up a bit. Use it to clean up around your cuticles and nail edges then apply some topcoat and it’s done.