This weekend, lots of nail art addicts are getting together to create Rainbow Pride Nails for Orlando. This community is so good at coming together and reacting to a crisis, and I am really proud to be a part of it. If you can, please consider donating to a fund for the families of the victims.
Polishes and tools
Cirque Carpe Diem
OPI Color Paints
AEngland Camelot
Rainbow Connection Zap
What’s Up Nails Hearts vinyls
Pure Color Watermarble tool
Winstonia Fine line brush
Cotton bud
Tweezers
I’ve got a new white polish, Carpe Diem, which I’m using for the first time. It’s not quite a one-coater, but I love the subtle lavender scent.
I applied two coats, then top coat and let it set.
How to watermarble through vinyls
- I protect the skin around my nails and up to my first knuckle with liquid latex from Rainbow Connection.
- Because my nails are so short right now, I cut my hearts vinyls in half before applying them. Stick them to the back of the backing paper temporarily to get rid of any cut outs that peeled away with the stencil.
- I stuck the vinyls to my nails, making sure they were stretched a little to lie flat. I trimmed as much excess from my nail tip as possible.
- I marbled with all eight Color Paints to make a bullseye and then used my watermarble tool to make the design. Lots of small, tight lines works best for the vinyls.
- I dipped my vinyled nails, removed the excess with a cotton bud, and pulled my nails out. Using tweezers I removed the vinyls as soon as possible.
- For the middle finger, after making a bullseye I dragged the tool through it once to make some relatively straight lines.
- Using black polish and the Winstonia brush, I outlined a heart shape freehand, and then filled in the space around it in black.
- Top coat over everything, and I’m done!
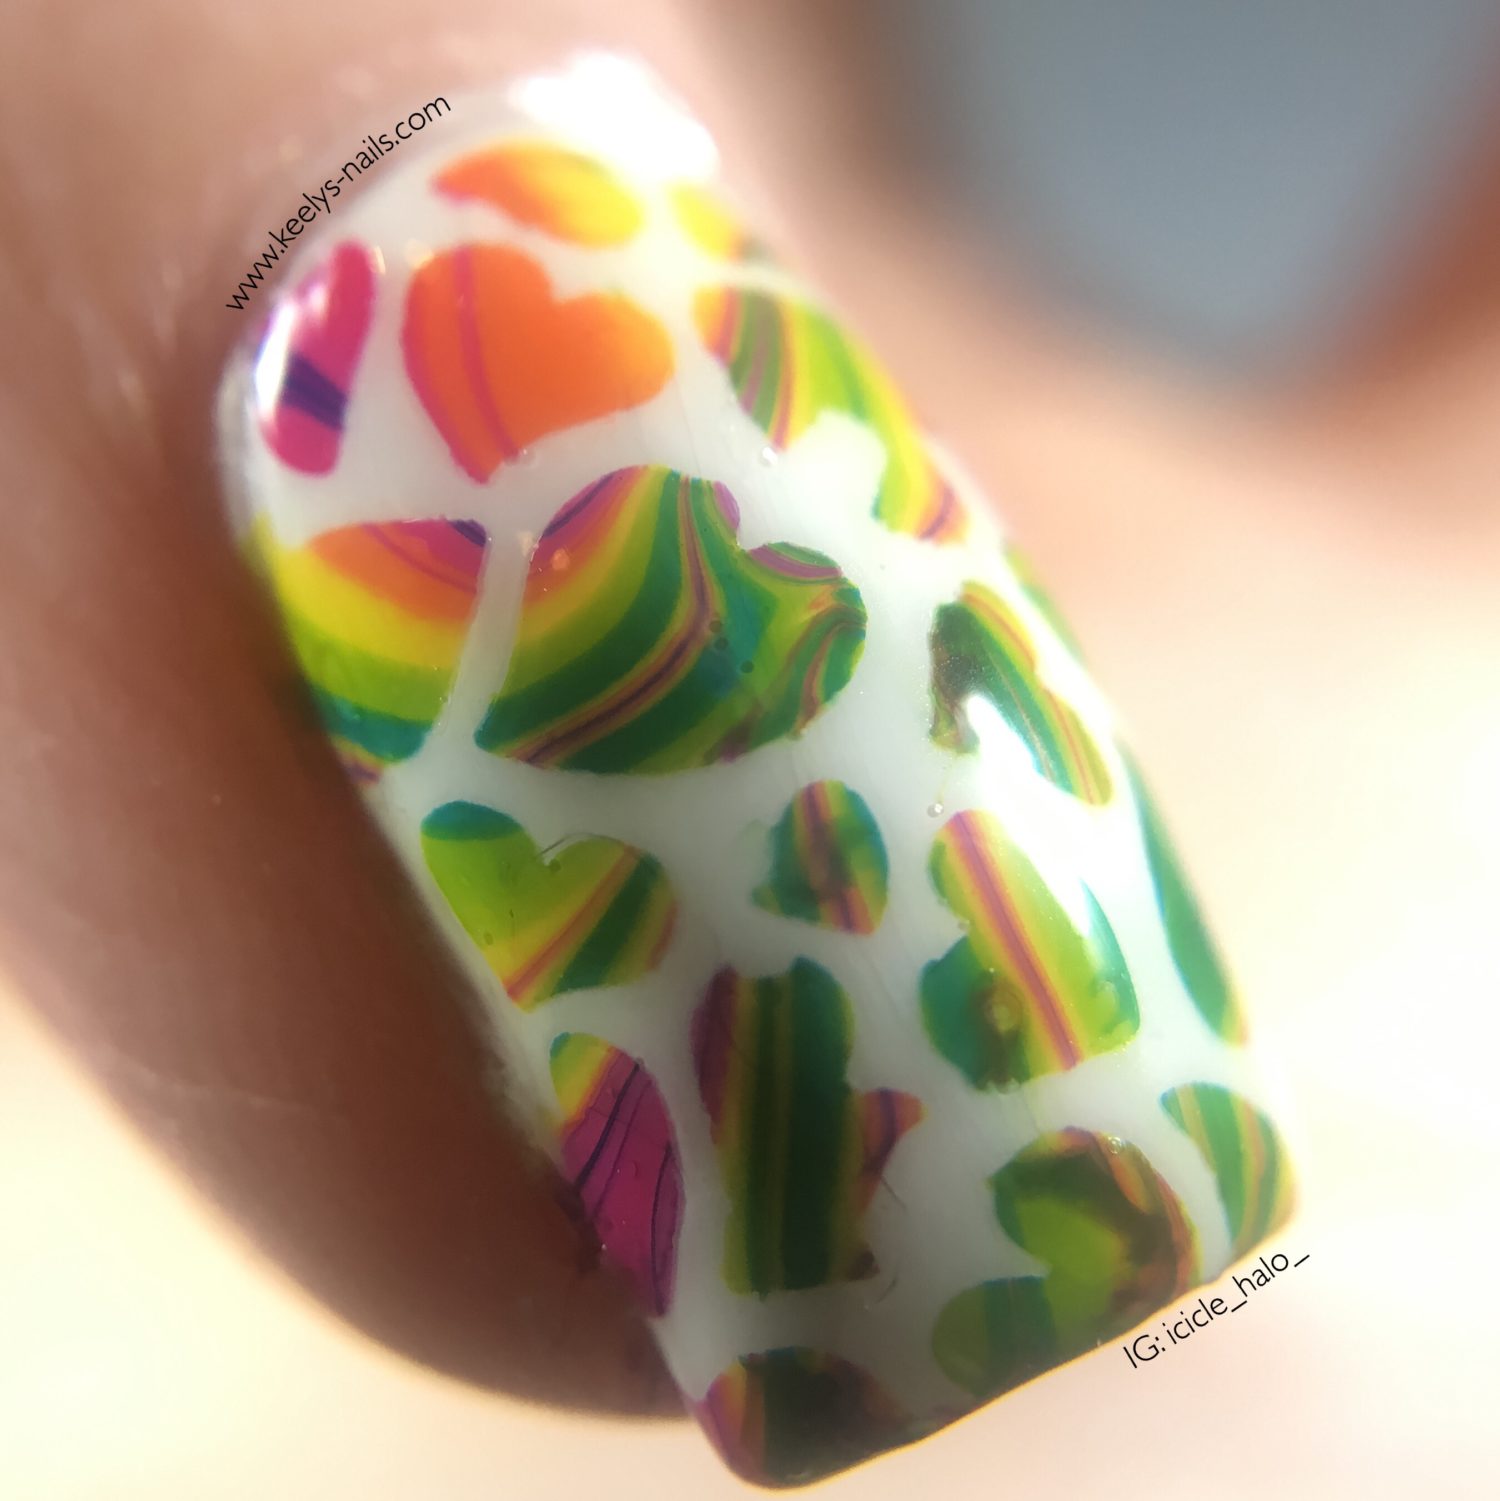
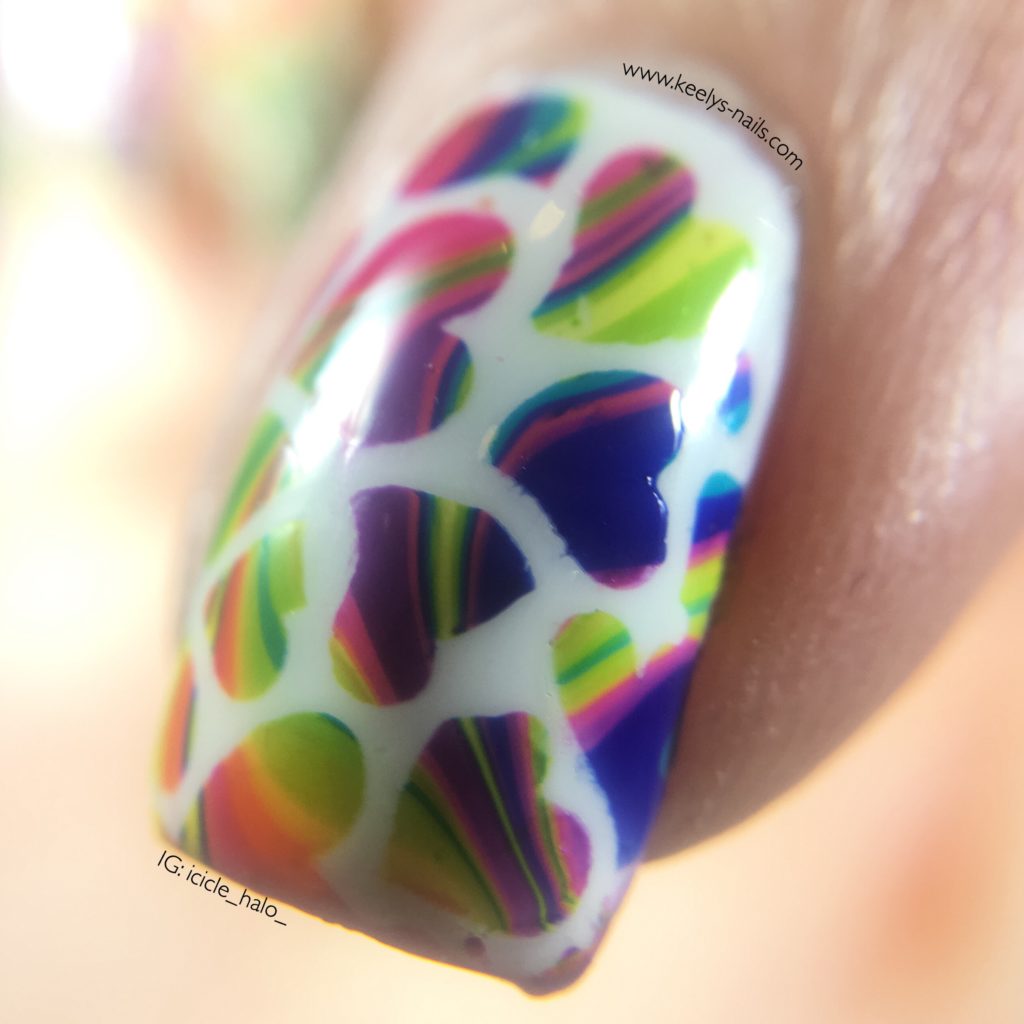
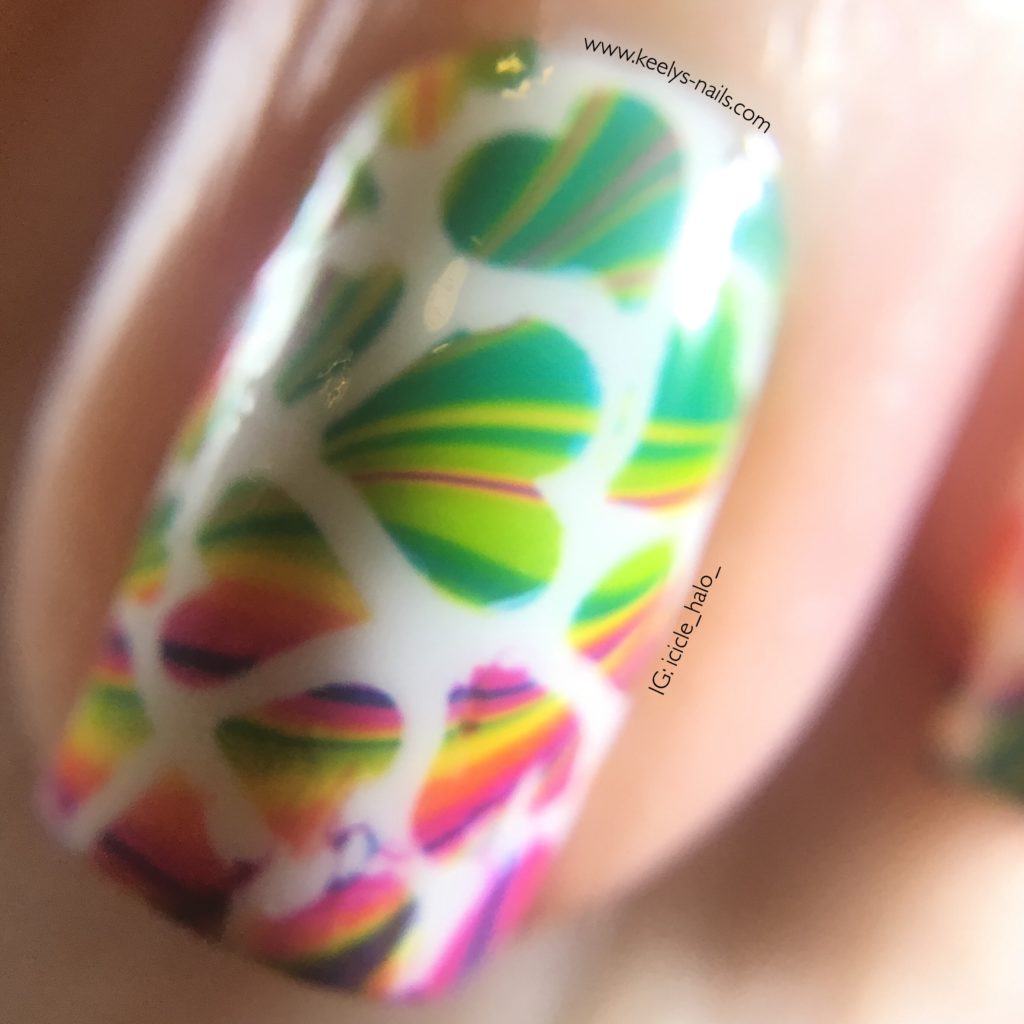
Time for a few macros! I’m really proud of how the watermarbled vinyls came out. I definitely got more complete heart shapes than last time.
You can see how dragging through the polish a lot to create a tight design comes out well through the stencils.
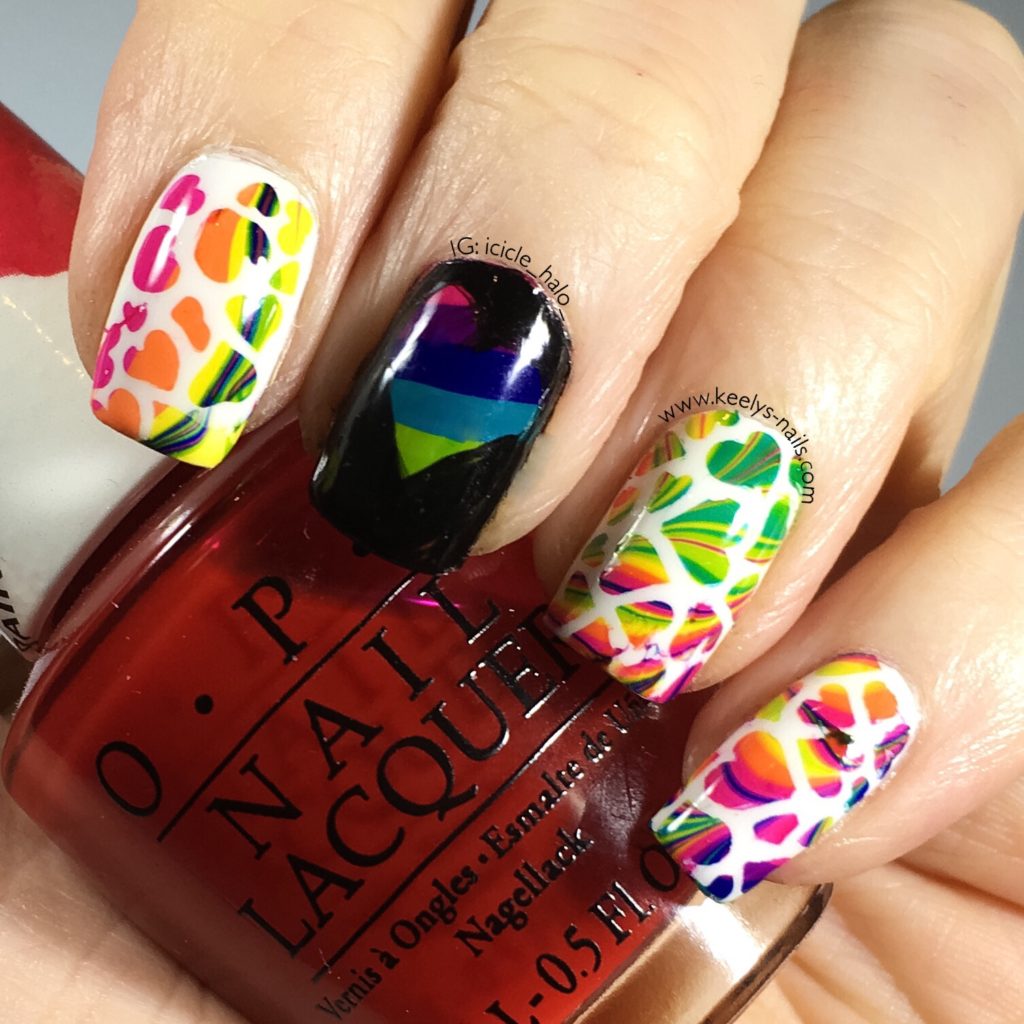
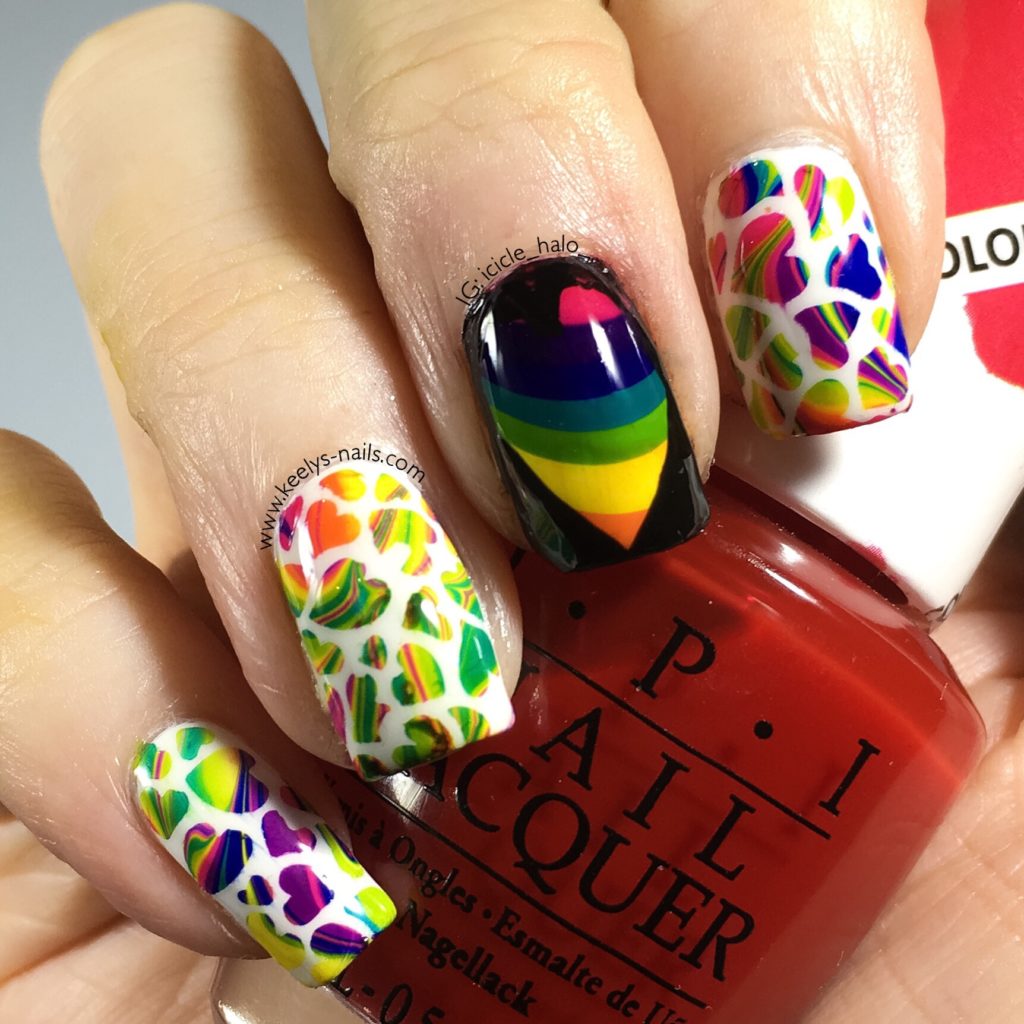
My feature nail hearts needed tighter lines too. The indigo/purple end of the big hearts are nearly indistinguishable from the black.
Rainbow Pride Nails for Orlando
Overall, I’m happy how these came out. I’m glad to get back into watermarbling again after a bit of a break.
All the colours of the rainbow are represented and the love symbols are exactly what I hoped for.
I hope you enjoyed looking at these. What are you doing to make Pride celebrations this weekend?

June 18, 2016
Your nails always look incredible!! Next weekend I have my brother’s wedding and I’m wearing a bright yellow dress. How would you recommend I do my nails?
June 18, 2016
I would go for a contrasting colour, maybe to match accessories. Bright pink, grey or silver would look great with bright yellow. Have a great time at the wedding!
June 18, 2016
These look amazing! I love how everyone is coming together and showing support in different ways.
June 18, 2016
Thank you Marie. It’s a shame it takes something like this to make it happen though 🙁
June 18, 2016
What a lovely little tribute. We’re always very impressed with your nails! These look stunning x
June 18, 2016
Thank you!
June 18, 2016
I always love to see your nail designs! They are so amazing! these are cute!
June 18, 2016
Thank Angela! I’m so proud of these ones 🙂
June 18, 2016
Your nails looks beautiful. You have the best nails I’ve ever seen 🙂
June 18, 2016
Thank you Claire! They are going down well at the 70’s themed party I’m at tonight too 🙂
June 19, 2016
Your nails always look amazing. This is a lovely sentiment x
June 19, 2016
Thank you Kerry. I like how we all show our support in different ways.
June 19, 2016
These look fab, what a lovely idea
June 19, 2016
Thank you Kara 🙂
June 19, 2016
Again Keely seriously amazing, I can just about apply a base coat without messing it up ha x
June 19, 2016
Thanks Rachel! It’s honestly just practice nothing else … And at least base coat is clear so you can’t see the mistakes!
June 19, 2016
Your nails are always so beautiful and this is no different. Lovely design.
June 19, 2016
Thank you!!
June 20, 2016
That’s so clever and professional. Wish I could do something like that 🙂
Alina from DIY blog
June 20, 2016
Thank you Alina, this is a little more advanced but there are loads of easy nail art techniques that you can do to start.
June 20, 2016
Gorgeous nails and what a thoughtful idea. I so wish that I was better at doing my nails, I struggle to just paint them!! xx
June 20, 2016
Thanks Laura! All you need is a bit of practice, it gets a lot easier 🙂
June 20, 2016
Wow, they look amazing! What a lovely way to honour those lost in the dreadful attack in Orlando xx
June 20, 2016
Thank you Hannah!
June 20, 2016
Wow Keely this is awesome! Not only you have beautiful nails but their for a good cause! How cool really!
June 20, 2016
Thank you Ella, I’m really proud to join in with everyone 🙂