
Are you a fan of the Marvel superheroes? I went to see the latest film this week. I prefer to leave it a little while after the release – not too long to dodge spoilers. But then I get to sit in luxurious space with no one in front of me! I created some Avengers Infinity War nail art to complement my visit…read on!

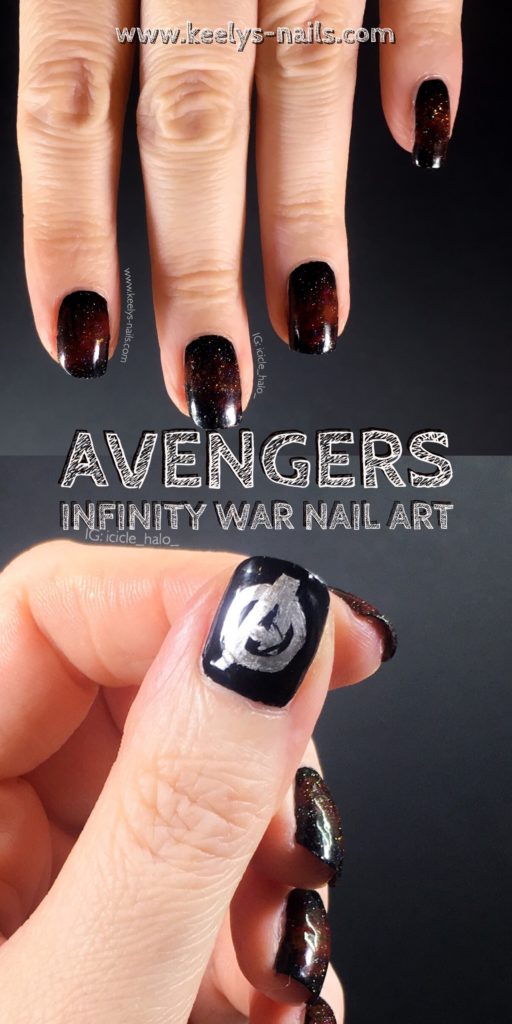
Some Avengers Infinity War nail art wouldn’t be complete without this logo!
Polishes and tools
Jessica Fusion
Orly Bonder
Painted Polish Midnight Mischief
Chanel Gitane, Rouge Puissant and Rouge Noir
Latex Sponge
Hits Speciallità Flamenco
ILNP My Private Rainbow X
OPI Push and Shove
Winstonia Fine Line Brush
Seche Vite
Rainbow Connection Angled Clean Up Brush
It’s brilliant using Midnight Mischief as a base, because it’s a one-coater. Definitely better than having to do a white base. First up, I created a red galaxy design to echo the background of the promotional posters:
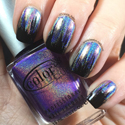
The Avengers take on Thanos in Infinity War
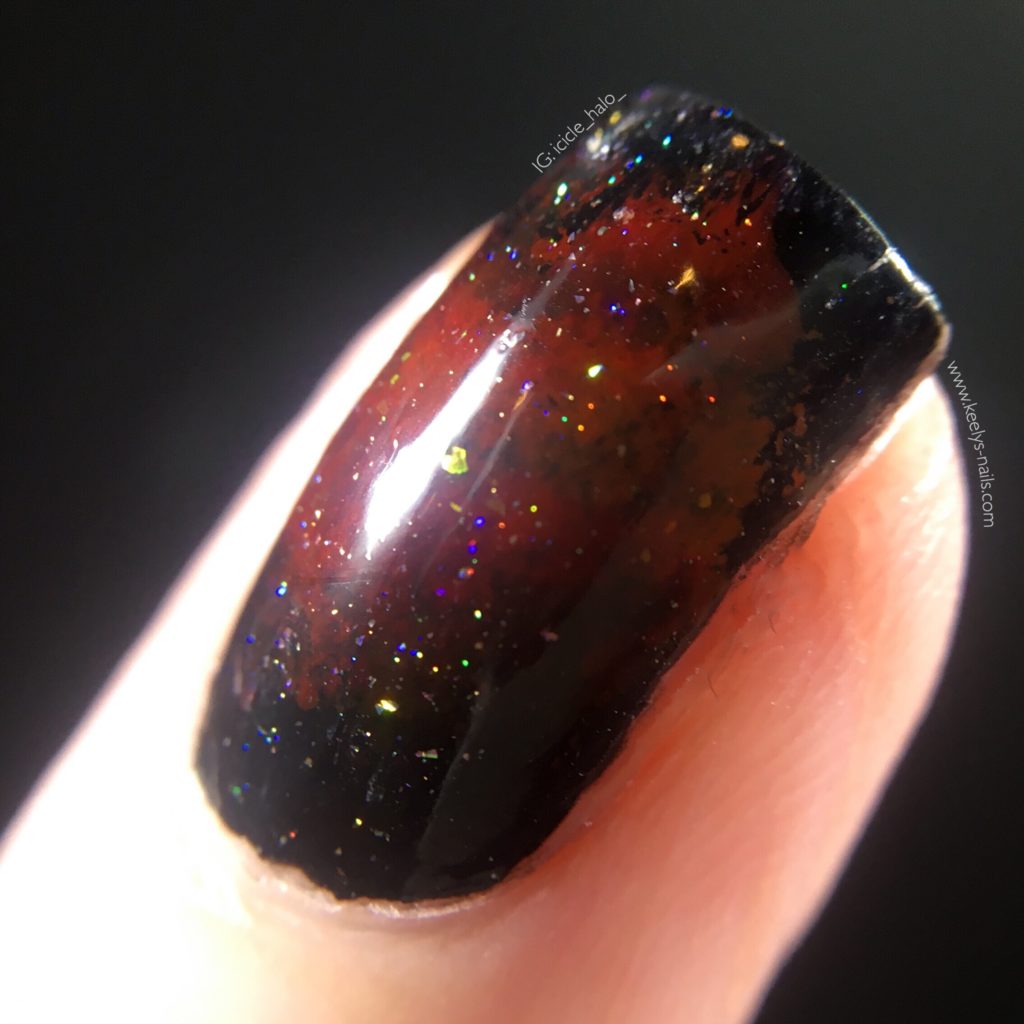
Creating a galaxy
I started with the lightest of my Chanel reds, Gitane. Using a little piece of latex sponge that’s been pulled off gives a rough edge and has a better effect with this sort of galaxy design.
I mostly kept this fairly central on my nails, but not identical by any means. Vary the position and angle if you can. If it’s a bit too harsh, keep dabbing and the sponge will soak the polish up and diffuse it a bit.
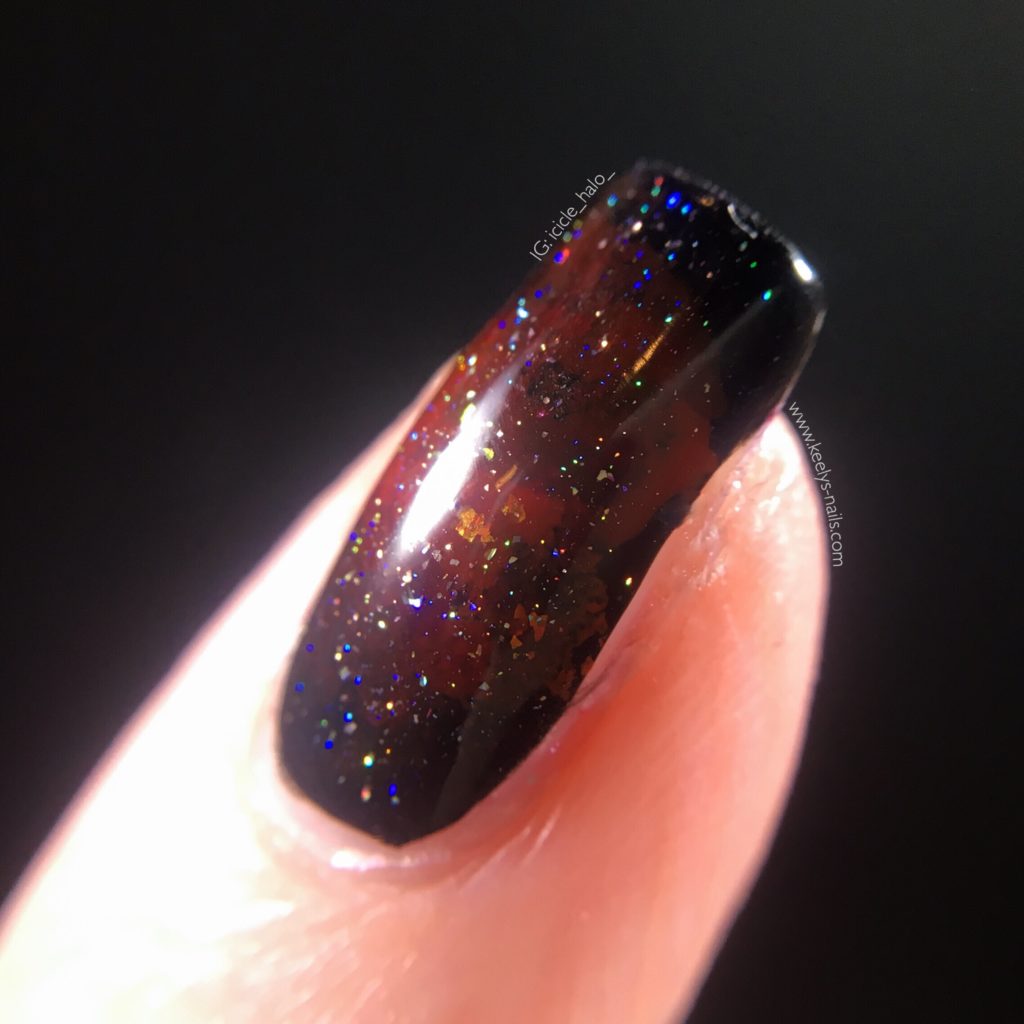
The flakies in the centre really add depth, don’t you agree?
Using the next red, Rouge Puissant, I used another piece of sponge to dab around the edges of the first. The different colours in the same family is what gives the depth you see.
Finally I used Rouge Noir right at the edges of my nails to blend into the black base. I added a tiny bit of Flamenco to the centre of the red to add to the three dimensional effect.
From a distance they are quite unassuming. A bit of white under the first red polish would have helped to bring it out more.
After that, a very light coat of holo microglitter gave me the stars to make my galaxy nails complete. Top coat those nails to seal it all in and smooth out any bumpiness from the dry-brush glitter.
Freehand Practice
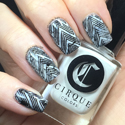
I’ve done an Avengers logo freehand before, when I used to do a lot more freehand. I’m definitely way out of practice (stamping has made me lazy!)
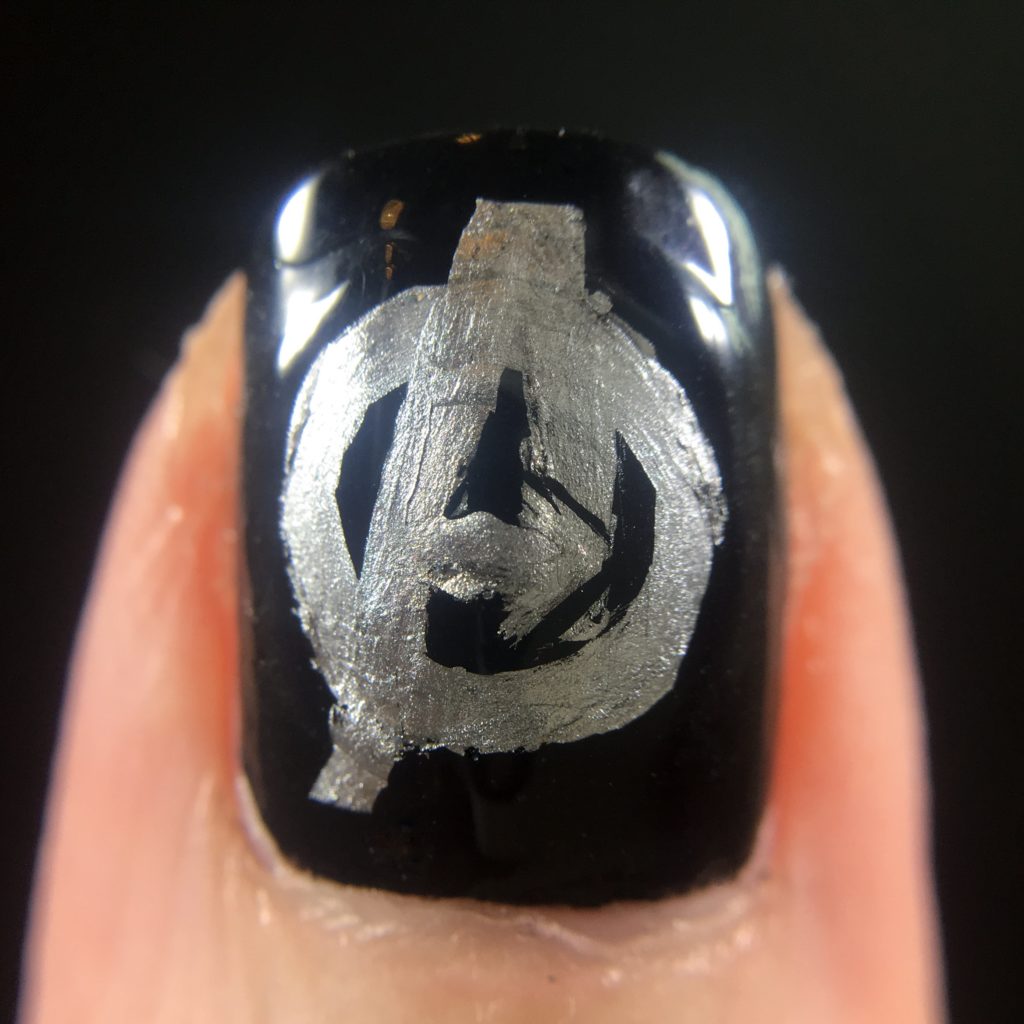
A closer look at the freehand logo from my Avengers Infinity War nail art
In fact, the one I did left-handed last time is better than this one. And I did it on both hands! I couldn’t bring myself to start on my left thumb after I spent so long on the first one.
Last time I temporarily had pointy talons which was fabulous and gave me a bit more room to play with. They didn’t last long – casualty of unlocking a door as I recall.
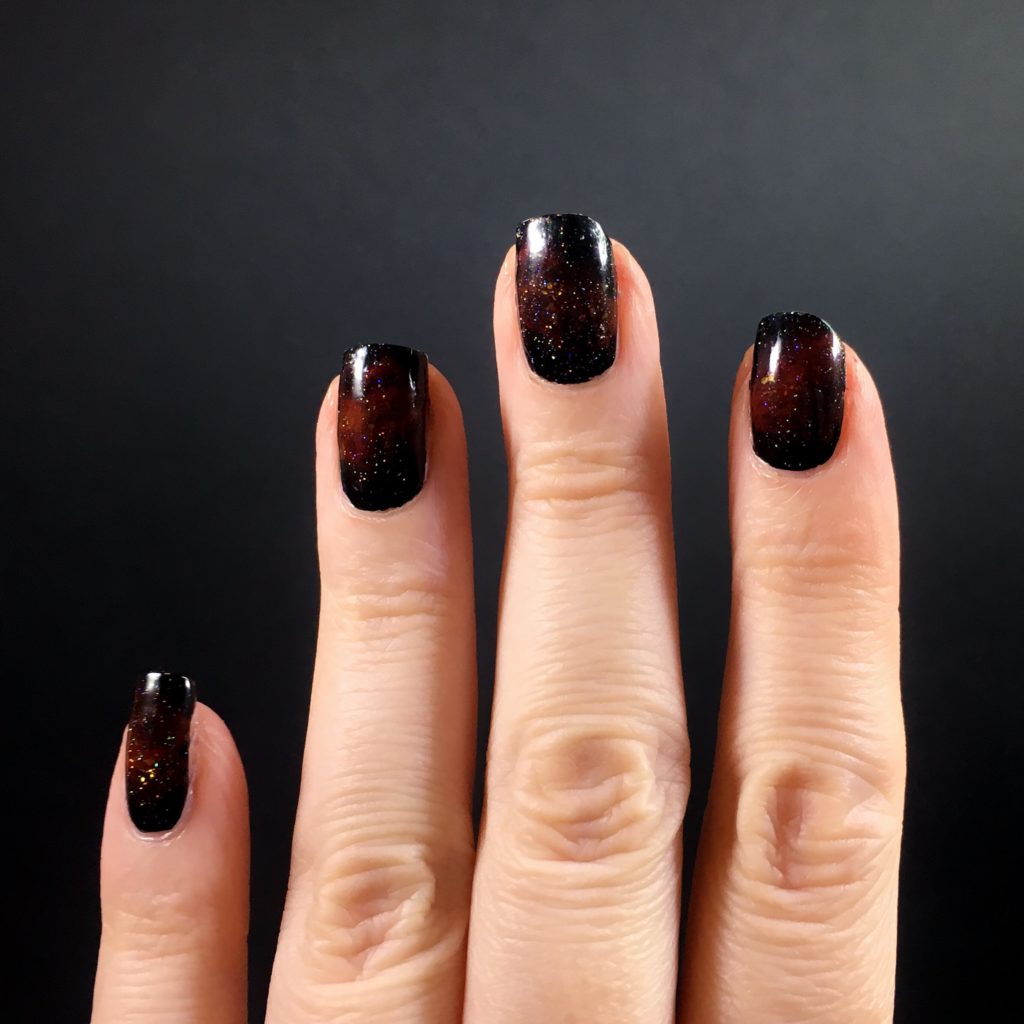
Galaxy nail art works in all different colours. Without the holo sparkle, you could turn this into tortoiseshell
Working mainly with Push and Shove and a fine brush, it was a bit of a struggle to make it fit. You can also carve out with your base colour – once you add top coat it disguises a lot of sins.
It looks a little bit rougher than I’d like, but I’m glad I haven’t completely lost the skills I had.
Avengers Infinity War nail art
Not really any spoilers, but Infinity War is pretty bleak compared to the films that came before it. There’s some lighter moments and humour in there too, but it’s definitely not for the younger fans.
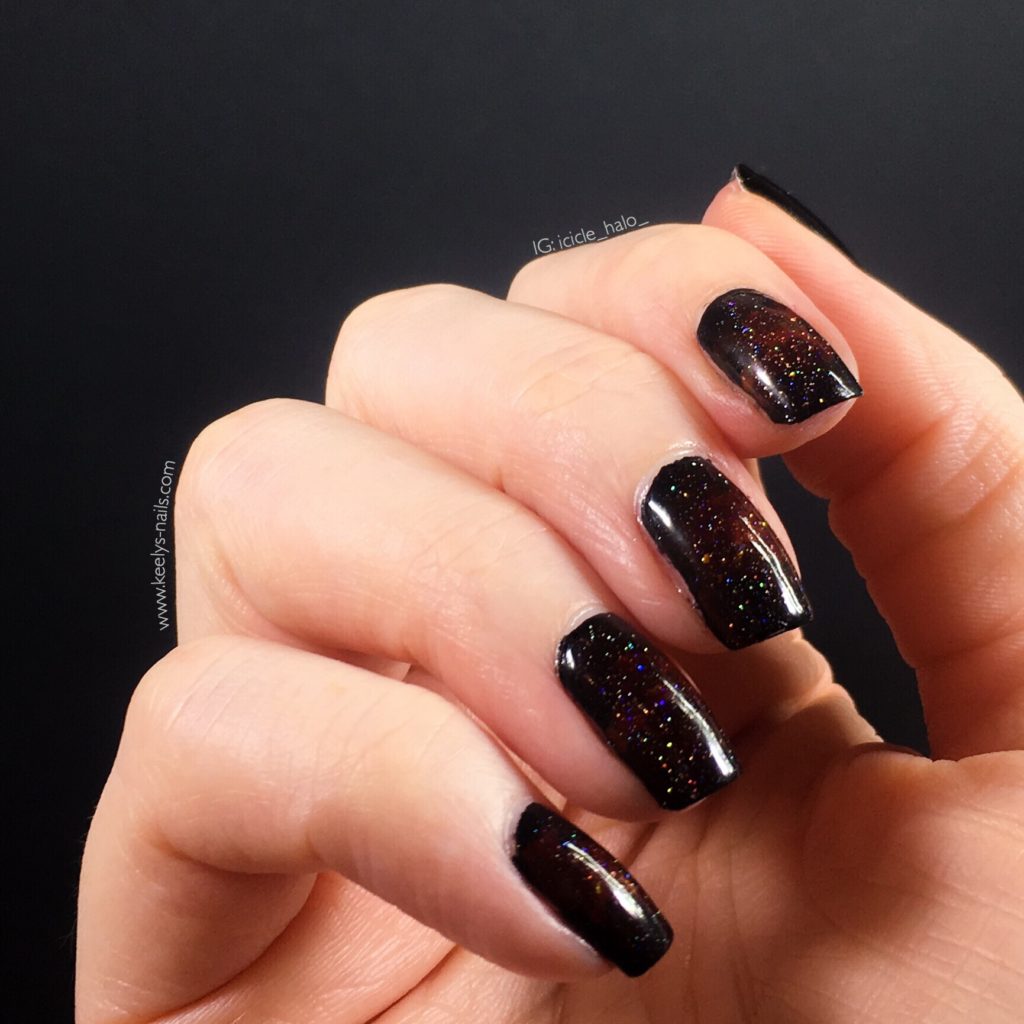
It’s a subtle design, but I like how my red galaxy turned out.
I can’t believe we’ve got to wait a whole year for the conclusion!
As for the nail art, it’s not bad. A little white polish under the red would have helped brighten up the colour a bit, by it looks good under bright lights. Lucky it’s been sunny!
Have you seen it yet? What did you think? Let me know in the comments below!
Pin it! If you’re looking for a step-by-step guide to creating galaxy nails or check out my rusty freehand skills, read all my tips here
May 15, 2018
I love this! It was a fabulous movie, but left you with a lot of cliff hangers.
May 15, 2018
I know! And it’s so long to wait until next February and May for the next Avengers films
May 15, 2018
the subtle galaxy is really neat.
May 25, 2018
Thank you Nichole, it’s some of my favourite nail art
May 15, 2018
Beautiful mani! I live the red galaxy and your take on the Avengers!
May 25, 2018
Thank you so much, I love doing galaxy nails
May 16, 2018
Very fun! I’m still crying from the movie…
May 25, 2018
OMG it was soooo traumatic. Roll on May 2019
May 16, 2018
I haven’t seen any of the Avenger films *hangs head in shame* but I need to check them out because this mani has inspired me.
May 25, 2018
Start with IronMan to ease yourself in gently!
May 16, 2018
I’ve never seen any of the Avenger movies either, but I’m really liking this nail art! I never would have thought to do a black and red galaxy!
May 25, 2018
It looks so cool – I’m going to try more single colours, maybe green next time
May 16, 2018
This is a super fun mani! I loved the movie but was not happy with having to wait another year for the next one.
May 21, 2018
Tell me about it! February and May seem so far away!
May 16, 2018
I too did an Avengers Infinity War mani. Yours is absolutely stunning x
May 25, 2018
Thank you so much Tracey! I saw yours – your freehand IronMan was amazing
May 17, 2018
That logo is great! I want to see it too!
May 25, 2018
Now is a good time to go before someone spoils it for you!
May 18, 2018
The logo looks perfect!
May 25, 2018
Thank you so much – drawing a circle freehand is hard!
May 18, 2018
Great job on the logo, that’s one steady hand!
May 25, 2018
I have to say it took a lot longer than last time, I am so out of practice!
May 19, 2018
Absolutely love the red galaxy <3
May 25, 2018
Thanks Jenn! I think I’ll do more monochrome galaxy nails soon 🙂
May 29, 2018
This is amazing (just like the movie!). I love the galaxy nails look, so pretty!
May 29, 2018
Thanks Di! I agree about the movie, it was definitely a memorable experience!