Opal Nails – inspired by Pshiiit’s video tutorial
I love reading Pshiiit’s blog – thank you Google Translate – and recently she posted a cool video tutorial. She used the watercolour technique to create glowy, opalescent nails.
NB: I’ve had another go at opal nails Pshiiit-style…
The watercolour technique is all about diluting polish with acetone or another polish remover, which gives a tinted liquid which you can use as a colour wash.
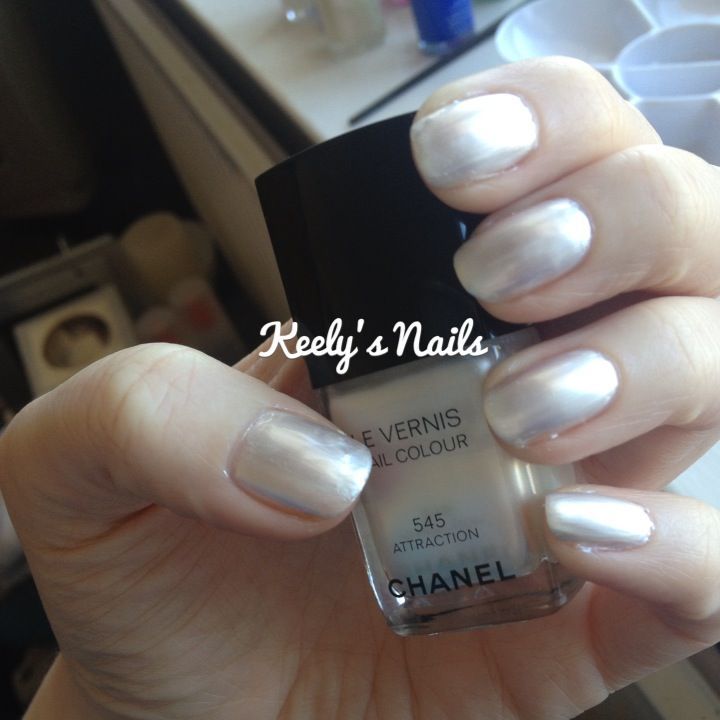
It was really pretty so I wanted to give it a go. I started with a base colour of Chanel Attraction for extra glowy opalness. Two coats on Nail Envy and sandwiching Sally Hansen Hard As Wraps.

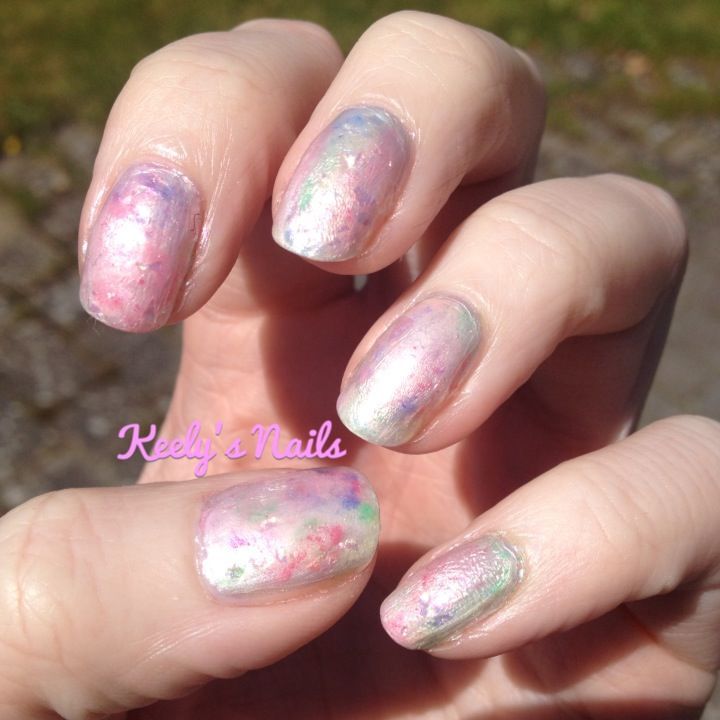
Opal Nails Pshiiit inspired
Polishes:
I used four colours for the watercolour:
Ciaté Purple Sherbet
Essie Watermelon
Nails Inc Baker Street
Barry M Spring Green
I diluted them with acetone and patted the colour on to the white base with a slightly fluffy paintbrush. Pshiiit’s tip about diluting a lot is important to follow. You only want a gentle cloud of colour or it will look not so great. But you can dip your brush in acetone to dilute strong colour on the nail – a top coat after the base colour but before the watercolour will stop the white from going patchy.
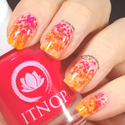
I worked my way round all 4 colours then added some flakies – Nicole by OPI in Heavenly Angel and Models Own Snowflakes. Some of my colour was still a bit too strong so I used Essie Kisses and Bises as a topcoat and then set the lot with Seche Vite. Essie K&B is an opalescent finish all on its own but is a very, very sheer polish. I don’t think you would get much of an opal effect with this alone, but I need to swatch this one to see what it’s really like.
Here’s the finished Opal Nails Pshiiit inspired in bright sunlight:
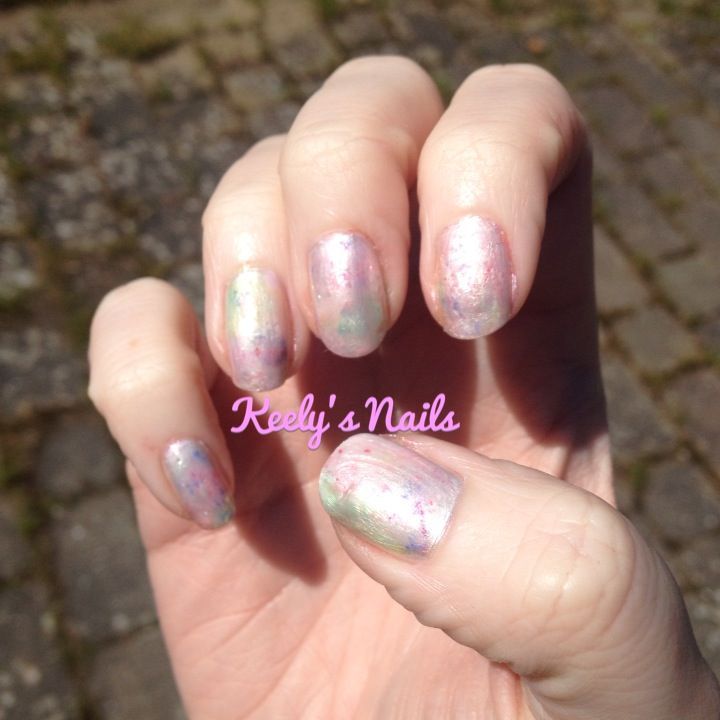
Opal Nails Pshiiit inspired
Next time: outlining nails and an OPI Oz the Great & Powerful glitter.

May 27, 2013
Lovely
August 19, 2014
Great site, Thanks for sharing!!